Cycling nutrition

When cycling any distance food and nutrition plays an important role. The most important things are

  • Taking on enough food and energy to sustain energy levels during the ride.
  • Eating the right combination of foods to fuel both the ride and recovery.
  • Long term nutrition, which helps promote good health to sustain high intensity training and nutrition.

The three main types of energy

  • Carbohydrate – the main source of energy whilst cycling.
  • Protein – important in recovery. Can play some role in fuelling a ride.
  • Fats – Good in the correct proportions. Not recommended to take whilst riding very hard, but on long rides, is fine in suitable proportions

Glycaemic Index.

In short ,the GI of a food tells you how quickly it converts into sugar. It is useful to know the GI of foods. As a quick rule of thumb, limit very high GI foods unless you are in the process of riding.

  • A low GI, like oats (26) is ideal for breakfast, giving a long slow release of energy throughout the day, without energy spikes.
  • A high GI gives an immediate release of sugar e.g. pure glucose has a GI of 100. High GI foods are OK, whilst riding, because the sugar will be used straight away. But, it is still advisable to take a mix of GI Index when riding – using both complex carbs and simple sugars.
  • However when stationary, high GI foods cause spikes in blood sugar that raise insulin levels to store it. Big spikes in blood sugar levels are not helpful to maintaining constant energy levels.

Food pre-ride / Breakfast

A typical cyclists’ breakfast is porridge / muesli. Oats are a very good food because they have a low glycaemic index; also they are gluten-free and can be easier to digest than a heavy wheat based diet. I am not gluten intolerant. But, I still like to take gluten free carbohydrates.

I choose a muesli without sugar added. I have quite a sweet tooth, but I don’t like sugar in my breakfast cereal as it is unnecessary. It is better to have foods with low GI for breakfast. To sweeten the porridge –  honey or some chopped natural fruit is the best.

If it was a really long ride, then I may take some eggs for breakfast during the ride as well.

Pasta for breakfast? There was a time when I though pasta was the holy grail. I heard Procyclists took pasta for breakfast so I did too. But, now I hear that is quite rare. I never fancy pasta for breakfast.

Things to avoid pre-ride

  • High GI snacks
  • Excess fibre
  • Excess fatty foods.
  • Spicy foods
  • Very heavy doughy foods (like Pizza is)
  • Red Meat (the days of pros eating rare steaks before long rides are long over)
  • Anything you’re not used to eating.

When to eat before cycling?

It depends on the effort involved. If it is a steady ride, then I can go out soon after eating breakfast. If I’m racing, I don’t take solid foods for 2-3 hours before the race. If it is a moderate intensity, like a sportive, an hour before should be fine.

Carbo Loading

Carbo loading is the attempt to fill the body with carbohydrate for the day of a big race. It may be useful for a rider doing a one-off ultra distance ride. Generally, it involves have 3 days of low carb consumption, followed by a day of heavy carb consumption, the day before. This can increase your weight as you take on more water and energy. Bear in mind,

If you eat much more food than usual, it can put too much pressure on the stomach, causing problems on the morning of the race.

Carb loading is not really used by pros, because they are racing on consecutive days anyway.

I only practise carb loading in moderation. If I have a long race, I will make sure I take a good amount of complex carbs, the night before. I keep a usual evening meal, but perhaps a bowl of oats for supper or possibly extra carbs as liquid food.

Food during the ride

During a ride, you need to take a lot more calories than usual. It is helpful to have a rough idea how many extra calories you will be burning. This will depend on your weight, duration and effort level.

I have written in more detail at energy consumption during a ride. But, to summarise,

The body can absorb around 60-80 grams of carbohydrate per hour.

  • Therefore, for optimal energy replacement, this should be a target. This means you should try and take 2-3 units of energy (25g energy bars) per hour.
  • For 1-2 hour rides, you will have enough energy stored not to really need much food. But, for long rides of 3-4 hour+, you need to start fuelling from the first hour to maximise energy uptake.

Food on a ride

Maltodextrin – a good complex carbohydrate, which is the most popular ingredient in sports energy drinks. Sometimes I like to have just plain maltodextrin. It is easy on the stomach and avoids problems associated with high fructose. I buy this Torq natural organic energy – which is 97% maltodextrin. Torq energy at Wiggle

Fructose / maltodextrin 2:1. Energy drinks now often have a mix of maltodextrin and fructose, some studies suggest this can enable a higher level of carbohydrate uptake because the gut  can process fructose and maltodextrin separately, and so is good for long rides. Just be careful not to overdo the fructose consumption, it can cause digestion problems. High 5 2:1 energy drink 1 Kg currently just £9.99

Carb – Protein 4:1 Another energy power mix is Four parts carb to 1 part protein (usually way protein). Studies suggest this can help for long distance endurance riding. The protein can be used as a source of fuel. It can also help the recovery process towards the end of a ride. I have bought a few boxes of 4:1 sachets. If I have 4 bottles of energy drink. I may have this for the 3rd or 4th bottle. I wouldn’t use for short distance, as I would prefer just a carb solution. High 5 4:1

Electrolyte / carb drinks. Quite a few energy drinks are marketed as ‘electrolyte drinks’ These are energy drinks which generally have higher levels of salts (electrolytes) and relatively lower percentage of carbs. I rarely get too hot on the bike, so only really need these in the height of summer or abroad. Again, I would be unlikely to just rely on electrolytes. For example, if I had a long ride, I may save the electrolyte drink for later in the day when it really hots up and it gets very sweaty.

GI index. During a ride you don’t have to worry about the GI of foods as much. For a short 2 hour race, I would take just mainly high GI foods. For a long ride, it is still good to get a mixture of food and slow release carbs, like oat based cereal bars.

Energy Bars

I take a lot of different energy bars. I don’t really have a favourite brand. Though I often buy boxes of 24 powerbars and 24 Torq bars. As well as these more expensive energy bars, you can take some cheaper bars that you find in a supermarket, like Nutrigrain and Fruesli bars. There energy composition is often quite similar to bars which cost twice as much.

There is a more in depth review of energy bars here.

Other non-specific Energy foods

  • Banana – The cyclists’ food. Ideal for popping in back pocket. Good source of Carb, relatively high GI of 65. Lower GI if more green and less brown.
  • Malt loaf – A good complex carb source. Gives you something solid to chew on. Not the easiest thing to eat, but can make a nice change on long rides.
  • Figs – I’ve never seen attraction of taking figs during a ride, but it’s often mentioned.
  • Marmalade sandwiches. Never did Obree any harm.

Recovery foods

After a ride, the first hour is very important to get good nutrition.  During the first hour, the body is most receptive to absorbing nutrition. It is a mistake to wait for a long time to start refuelling. If it was particularly hard, I like to take a recovery drink because.

  • Easy to absorb.
  • Helps rehydrate.
  • You don’t always feel like eating after a big effort.
  • Keeps you going until you’ve had time to prepare food.

Quite often I start with recovery drinks food towards the end of a long ride. I like these protein recovery bars, I may have this at the last hour of a long ride. Recovery drinks can come in the form of Soy or Whey / milk powder. Again, I have both, I’ve used SIS recovery which is Soya.

Post ride meals

There is no hard and fast rule about what to eat after a ride. I try to get a good balanced meal – carbs, protein, fats, fresh vegetables. I like lentils for a low GI and mix of carb and protein. Usually I take with vegetarian (tofu/ quorn) sausages and quite a lot of vegetables.

One very rough rule of thumb is that a colourful plate is likely to have a good range of nutrition (excluding the tomato and brown sauce)

Cheaper recovery food drink

  • Milk – is an excellent recovery drink, unfortunately, I just don’t like drinking straight milk.
  • Coconut Water – excellent for de-acidifying the stomach after long ride.

Training and food uptake

Food intake depends on the rider in question. An experienced rider will train the body to better and burning fat. Therefore, they can get by on less carb intake than an untrained cyclist.

Long term nutrition

Western diets can be unhealthy, unless we are careful. There is a lot to be said for avoiding processed / fast food and eating a well balanced diet, with plenty of fresh fruit and vegetables. If you eat a balanced diet, you should gain the trace minerals and vitamins that the body needs. Many riders like to take vitamin supplements on the basis that you can ensure you don’t miss out. Personally, I always buy and then forget to take.

Supplements for cycling?

Are there any supplements worth taking?  Some suggest Beetroot juice and Beta Alanine. – see Supplements

Managing a balanced diet is the best way for long-term weight maintenance.

Related pages

Specialized Armadillo long term review

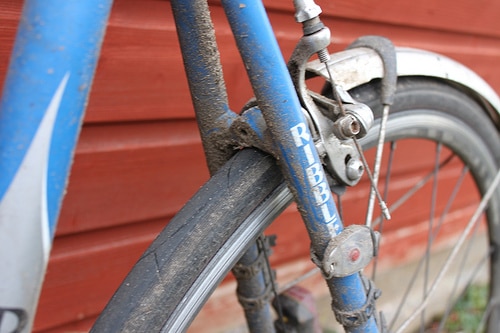
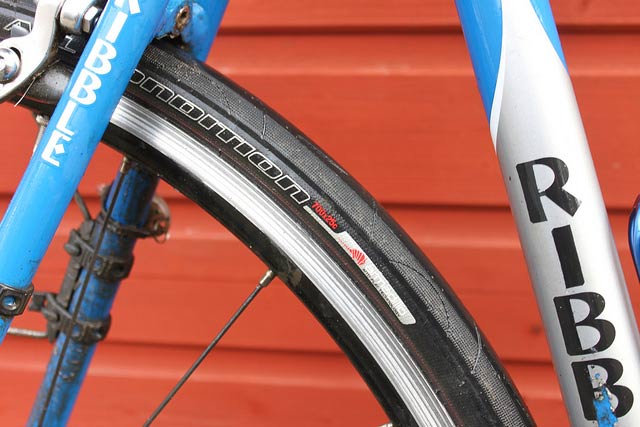
I’ve been using Specialized Armadillo road tyres for the past four – five years. In that time, I’ve only had one puncture, and that was a pretty big nail which would have puncture most tubs, tubeless and tyres. I use Armadillo’s on my commuting bike and sometimes on my training wheels for winter training. I know other people who have used them for a similar time and have either not punctured or just got the occasional puncture.

armadillo-allcondition
An Armadillo in action on rear wheel of training bike. Winter grit and thorns seem to have no effect on the tyre.

In summary, Specialized Armadillo are a very sturdy, strong and puncture resistant tyre. The inevitable downside is that they are heavier and with a poorer performance on rolling resistance. But, if you don’t mind some compromise in performance, you can get greater peace of mind and spend less time at the side of the road mending a puncture. This is important for the commute into town, where I don’t carry any spare inner tube or pump.

They are not completely puncture proof. It maybe a tubeless tyre with self-sealing slime liquid offers an even better puncture resistance system. But with the Armadillos a puncture is going to be a very rare occurrence.

This winter, I did ride quite a lot with a Specialized Armadillo on my front and rear training wheel. (I didn’t really plan to do this. It just kind of happened.) Now it is summer, I wouldn’t want to be riding an Armadillo whilst training. You feel there is some compromise in performance, and there are other lighter tyres which still offer very good puncture protection (e.g. the Continental GP and Gatorskin) Compared to a Gatorskin, the Armadillo feels slightly slower and a harsher ride.
armadillo-all-condition-front

Durability

The Armadillo’s also seem to be much longer lasting than other tyres. My commute often involves a rough canal path and they haven’t needed changing for a long time. I think I’ve had my front tyre for nearly 3 years now. The back tyre needed changing after 2 years commuting. So even though they cost £30, they are good value. After three years, my front tyre is now looking tired and in need of a change it. Though I could probably get more use out of it, if I really wanted to.

Read more

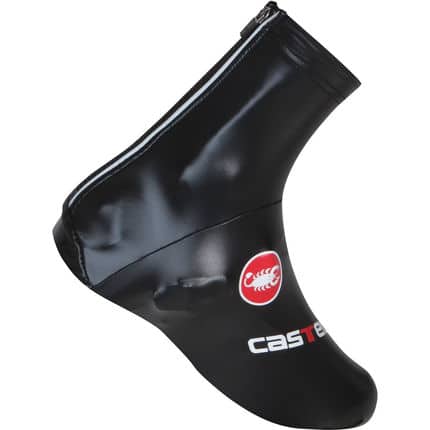
Castelli Nano waterproof overshoes

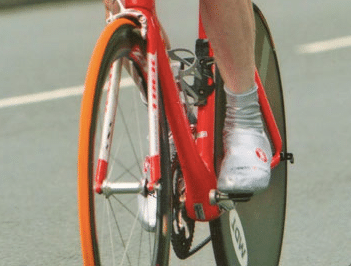
Castelli Nano waterproof overshoes are a lightweight aero / waterproof overshoe. I’ve been using for the past two years. I’ve just bought a second pair after the first one wore away (mostly due to crash damage)

At this time of the year, I nearly always wear these, even if it is a training ride. Although quite expensive for an overshoe, I’m a big fan of this. Buying a second pair is always a good sign.

castelli-nano-shoecover-12-black

Features of the Castelli Nano overshoes are:

  • Easy to fit on shoe. I leave it on the end of the toes when taking shoes off and then just pull up ankles when putting shoes on.
  • Thin and lightweight to wear, you don’t really  notice them
  • It gives a reasonable protection from shower and spray. If it rains heavily, you feet will definitely get wet. But, then I’ve never come across an overshoe which can 100% keep your feet dry. It is useful for light showers or days when there is spray from the road. It does enough to keep the feet a bit drier and prevent wet feet for a little longer.
  • They give some warmth protection, especially in wet conditions, they help avoid the coldness from damp. They also help keep out the wind coming through cycling shoes built for hot conditions.
  • In mild conditions, it’s just a bit extra insulation, whilst remaining breathable and light – For days when a proper neoprene overshoe would be overkill, these can keep the edge off whilst it’s still cold in the morning.
  • They are easy to wipe clean and keep your shoes clean
  • They help improve aerodynamics, useful if your time trialling. If it is a big race, I will use the much more expensive Smart overshoes (£85) but for less important races, I use the Castelli Nano because they are cheaper and I can protect the £80 from overuse.
  • They are pretty sturdy for an overshoe. Over the years, I’ve tried many overshoes and find that they are prone to disintegrate pretty rapidly. I’ve tried wool based overshoes, but they tend to rip and shred quicker than this rubberised lycra. To say they get a lot of use, they have done well to last nearly two years. You can’t really expect thin overshoes to last any longer.
  • The zip is strong and sturdy – unlike many overshoe models

Read more

Tubeless tyres – pros and cons

Tubeless tyres are a ‘relatively’ new technology that dispenses with the need for inner tubes. Instead, you use specific wheel rims which can keep an airtight seal between the special tubeless tyre and the bead on the wheel .

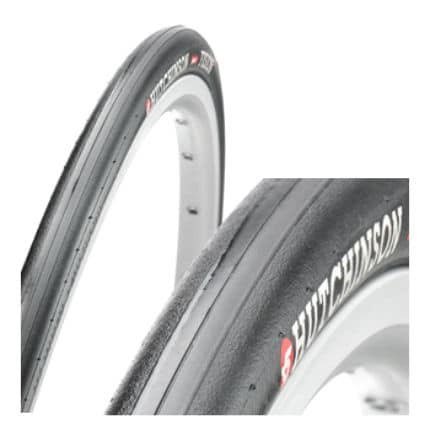
I’ve updated this post because (inspired by readers comments) I’ve got round to actually buying and using a tubeless (Hutchinson Atom). First impressions are very good,  I was quite surprised because previously I had decided it wasn’t worth the hassle. But, now I’m considering next wheel purchase will be tubeless. It was easy to fit and I’m fairly confident to run that wheel virtually puncture free.

hutchinson-fusion3-tu-med

The main advantages of tubeless technology are:

  • Avoiding those irritating pinch flat punctures, where you get the inner tube pinched between rim and tyre. Some claim this is 99% of punctures, but I don’t believe it is that high. Nevertheless, I’ve had many pinch flats over the years, tubeless eliminates these.
  • If you want to ride at lower tyre pressure, tubeless are good because you don’t need to worry about pinch flats. Lower tyre pressure can be good for giving better grip and traction and comfort. (though a lower psi will also have a higher rolling resistance)
  • With tubeless you can put a small amount of liquid sealant in the tyre. If you puncture, this sealant will fix most of these punctures. This gives you excellent puncture protection – better than standard inner tube and tyres where you can’t run sealant.
  • Alternatively, if you do flat, you can put in a spare inner tube, and the tubeless tyre will still work
  • Can be marginally less weight than a standard clincher tyre and inner tube because you don’t need an inner tube.
  • If a tubeless tyre does puncture, air should escape more slowly – there is less risk of the inner tube bursting and causing a rapid deflation – which could be dangerous when descending rapidly. I ran an ordinary inner tube on a tubeless wheel, when I punctured, I was able to cycle home 7 miles because the air leaked out very slowly.

Disadvantages

  • They can be difficult to fit. Because the tyre needs to be airtight against the rim, many models are difficult to put on. This is a real pain if you puncture out on a ride. For some tyres you may need an air compressor to put on. However, this doesn’t have to be the case. I found that the Hutchinson Atom tubeless went on very easily. The other advantage of fitting a tubeless tyre is that you don’t have to worry about using tyre leavers – there’s no inner tube to pinch.
  • To get the best from tubeless tyres is it advisable to purchase some sealant. This makes it airtight and also enables punctures to be fitted.
  • So far they haven’t really caught on, (at least for road bike. MTB seems more successful because MTB tyres are often at lower pressure). There is no critical mass meaning most local bike shops often don’t carry them.  Even online, the choice isn’t great.
  • They are not particularly cheap.
  • Ordinary road tyre technology has improved a lot meaning you can get some good tyres which rarely puncture. These days clincher tyres are really quite good value. As long as you are very careful in refitting an inner tube to avoid puncture flats, there isn’t such a big puncture risk.

Read more

Endura BaaBaa Merino baselayer

endura-baabaa-baselayer

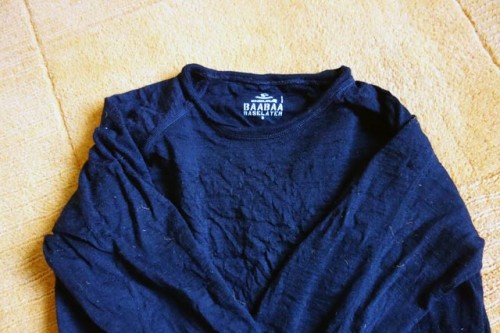
I bought this Endura BaaBaa Merino baselayer in anticipation of some cold wet early season time trials. Merino wool offers good insulation, but really comes to the fore when wet. It can retain heat reasonably well, even when it is damp day.

Sizing

Although 6 foot 3 – 38″ chest, I choose size S. I wanted it to be tight fitting to go under a skin suit. If anything, Merino wool can stretch a little over time with use, so I’d rather go for a slightly small size rather than large. It fits well, though a little short in the arm, which is to be expected given my height.

The recommended sizing is

S-36-38, M-39-41, L 45-47, XL -42-44,  XXL -48-50

Review

endura-baa-baa-merino-l-s-base-layer

Merino wool makes a good base layer because it is reasonably soft against the skin (though not as amazing as some Merino advocates claim). It is also excellent at wicking away sweat. It never seems to get heavy with sweat, which some other materials can.

A surprising number of people have told me that you can wear Merino wool unwashed for two months, and you still don’t get any untoward smell.  I can’t say I’ve ever dared test this to the limit. But, you can see how that is possible.

It can be put in the tumble dryer, which is good. When you take it out, it seems dry already. Whereas other clothes take longer to dry.

It offers a good layer of insulation. It is quite warm, without being too heavy. I’ve used it on quite a few damp and cold rides this summer, and has always performed well.

Read more

Best road tyres

Now the winter is  officially and very firmly behind us (cue return of rain, sleet and snow) it’s time to take off the winter road tyres and choose the best summer road tyres for all the upcoming halcyon days of riding on dry smooth tarmac in temperatures approaching the mid 30s.

Depending on the tyre you choose, there can be a big difference in terms of rolling resistance –   up to  30 watts worth between best and worse performing. Also, The faster you go, the more you will notice the difference.

Over the years I’ve tested quite a few different road tyres. To some extent it becomes hard to choose between different models. But, the good news is that I feel the technology of tyres has improved in recent years, giving cyclists a really good choice of tyres. Because I have so many sets of wheels, I’m often riding several different types of tyres / tubulars at the same time, which gives an idea of how different tyres compare.

I would say the golden rule of buying tyres is don’t penny pinch. It is invariably worth getting a relatively expensive tyre. The cheapest models of tyres tend to be poor value.

When choosing tyres, it is always a trade off between different factors

  1. Low rolling resistance
  2. Low weight
  3. Puncture resistance
  4. Aerodynamics
  5. Grip on the road
  6. Ease of maintenance – changing in case of puncture e.t.

Generally racing tyres will be light, low rolling resistance, but you sacrifice some puncture resistance. I’m often torn between using the lightest tyres and risk having to walk along a dual carriage way because of puncturing. It is only on hill climbs that I really throw caution to the wind and ride track tubulars which are ridiculously light. For my general road bike, I tend to go for a good all-rounder, like Continental Gatorskin / 4 season. For racing, I use tubulars – either Continental Competition (Good puncture protection, but definitely not best rolling resistance) or Corsa Crono Evo)

Fastest tyres

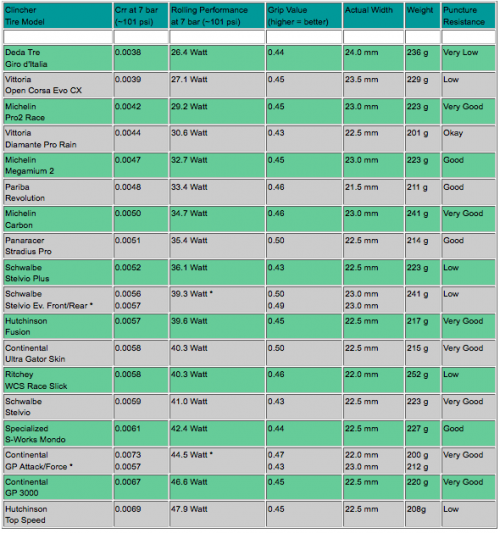
When buying tyres, it is hard to know the rolling resistance that the tyres offer. From trial and error and testing, you can notice a difference between different tyres – especially when doing time trials, but it is always tricky to measure exactly. The graph below shows the power required for different tyres, which were tested at Continental in Germany Link. If it was tested at Continental, it’s interesting that Continental tyres don’t come out so well on the rolling resistance.

The test shows the rolling performance at 7 bar (101psi) and the power needed to overcome rolling resistance of the tyre. This shows, there is over 20 watts difference between the worst performing tyre (Hutchinson Top Speed) and the best performing tyre. With a threshold power of 300 watts, 20 watts is a lot to give away to a slow tyre.

tyre-rolling-resistance
Source: Link

Vittoria Open Corsa Evo CX

vittoria-open-corsa-evo-cx-clincher-tyre-black

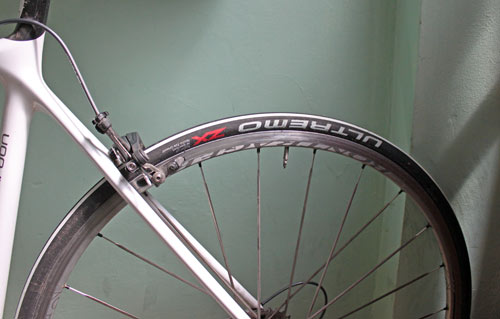
I have used the Vittoria Open Corsa Evo, but I was probably put off re-buying by the relatively poor puncture protection. However, looking at the rolling resistance, it is a tyre which is really focused on performance, with very low rolling resistance. If you want one of the fastest tyres, this is a very good choice. The weight is just 210 grams for the 23″ option.

Vittoria open corsa evo at Wiggle RRP £49.99 on offer at £29.99

Read more

Preventing and treating saddle sore

Saddle sore is a common affliction for cyclists, especially when you spend increasing amounts of time in the saddle. To some extent they are inevitable and can’t be avoided. But, it is worth trying to minimise their frequency and severity as much as possible, because they can become a real pain.

Many non cycling friends say that saddle sore is the biggest reason why they stopped cycling. It seems a real shame because they could probably make a big difference if they tried a few things. Some of the biggest names in pro-cycling have been afflicted with saddle sores – from Eddy Merckx (couldn’t start 1976 tour) to Joop  Zoetemelk pulling down his shorts to show journalists a boil ‘the size of an egg’ on his inner thigh, to explain why he wasn’t able to challenge the winner of the 1976 Tour, Lucien Van Impe (Guardian link).  Greg Le Mond abandoned the 1992 Tour de France on the l’Alpe d’Huez stage blaming unending torture from saddle sores. Fortunately, there is no need to despair as we can reduce the frequency and severity of sores.

Saddle sore typically has 3 stages:

  1. Mild skin abrasion / chaffing
  2. Red acne lumps, like acne (folliculitis)
  3. Abscess

The third stage requires medical treatment, and not just self-medication.

Prevention of Saddle Sore

Prevention of saddle sore is the most important thing we can do.

Increase distance gradually. Firstly, if you are new to cycling, there is an element of getting used to cycling. If your posterior is sensitive at first, it will get less so, the more you cycle. If you start off with very long rides, you are not accustomed to – saddle sore is much more likely. I think I get less saddle sores than I did when I first started cycling. There is another reason. As your legs get stronger, they are able to take a bit more weight and less for your butt.

Stable position. Related to the first point, saddle sore is more likely if you are rocking around your saddle. If you have a stronger core and can keep a strong position on the bike, it will help reduce irritation.

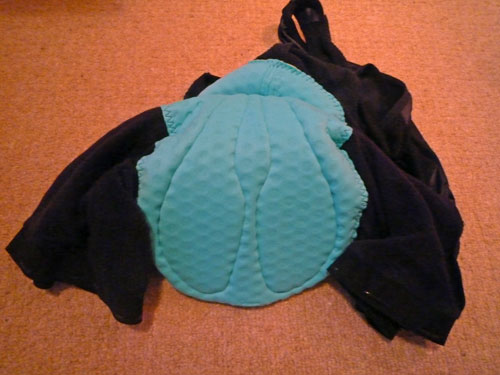
Buy the best shorts you can afford. Always use a good non – seamed cycling short (just in case you were afraid to ask – you definitely don’t want to wear underwear underneath cycling shorts!) A good quality chamois or synthetic chamois leather is important. From personal experience, I found some cycling shorts to be much better padded than others. The worse were some custom Impsport shorts, which were truly dreadful. In between were some Dhb Aeron Pro (£69.99) The best are unfortunately the most expensive. I strongly recommend the Assos F1 mile padded cycle shorts – I’ve found it really effective in giving the best comfort for long cycle rides. If you do regularly ride over 3 hours, it will be money well spent. There may be other shorts not as expensive which are still good. But, obviously I haven’t  been able to test all varieties. ‘Reassuringly expensive’ is perhaps an apt description of Assos shorts.

t706-shorts-assos2
£150 for a pair of shorts is some of the best money I’ve spent in cycling..

Use a good chamois cream. This can help reduce chaffing on the side of the saddle. My current Adamo saddle is a bit wide, so I’ve got into the habit of always putting chamois cream directly onto the skin, in the area where chaffing is likely to occur. (e.g. Assos Chamois Cream or other, such as Udderly Smooth which is a bit cheaper. As a last resort a bit of vaseline will reduce friction)

Move around. During a ride, take time to alter your position; give yourself time out of the saddle to relieve the pressure. Some kind of hilly rides will get you out of the saddle without having to think about it. But, other flatter rides, you may need to make sure you do relieve stress, every now and then. Note, you need to do this before your butt starts to feel numb or hurt. This is particularly important in time trials or when you are on the turbo because you’re more likely to get stuck in the same position.

Make sure your position is correct. Awkward positions could lead to too much pressure being put on the saddle. The weight should be evenly spread over the bike. If your seat is too high, your hips wiggle around more.

Don’t drive home in your sweaty shorts. Get clean and dry and soon as possible. It is essential to always wear clean shorts for every ride. I also find a bit of talcum powder with Daktarin (anti-fungal) added to be excellent for preventing any fungal problems. If it might be difficult to get a shower straight after a race, buy some antiseptic wipes to apply to groin area.

At night wear loose fitting pyjamas to reduce contact and allow air to circulate into the nether regions

Methods for dealing with existing saddle sore

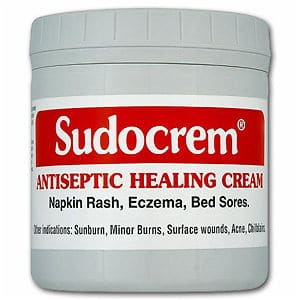
Sudocrem one of best defences against saddle sores
  • Check for first signs of abrasion, and keep wound clean and disinfected.
  • Apply Sudocrem (12% Zinc Oxide). This is designed for sores and abrasions, and works quite well. I tend to put on sudocrem as a matter of habit after a ride now.  (Sudocrem at Amazon)

    Read more

Tight hamstrings and exercises to loosen

roller-massage

Since an accident back in January, I’ve had a problem with tight hamstring in the left leg which got injured. It was never particularly painful and it didn’t stop me cycling. But, tight hamstrings are not something to ignore as it can be a sign of long-term problems. Also, just resting tight hamstrings is not enough for solving the issue. A few weeks ago Cycling Weekly had a good article on tight hamstrings, which was good timing for me.

I’ve been trying three things to help loosen the tight hamstring.

1. Trigger Point massage roller

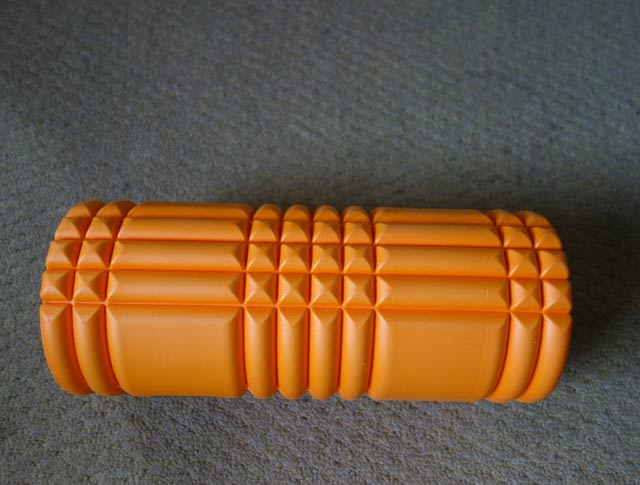
I bought one of these massage foam rollers from Amazon.  Trigger Point Performance Foam Roller

roller-massage
roller-massage

They are £35. They work best on massage the back of your thighs, where your hamstrings are. It is harder to massage others parts of your legs. But, it feels good and the product seems well made. In the absence of access to a massage, these feel like they do a good job in giving some kind of massage. They are particularly helpful for stretching the hamstrings.

Read more

Broken stem and stranded without bicycle

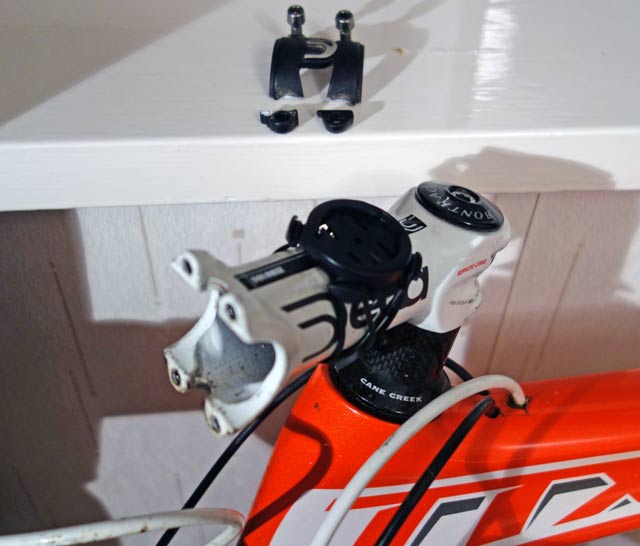
On Saturday, I mentioned my tribars came loose and kept moving around. On Sunday, I looked at the problem and started to tighten the stem bolts which had worked loose. Tightening them up and the end of the stem snapped.

broken-stem

I don’t want to have to buy a new stem just for one day’s cycling. So I’m stuck without bicycle for two days. It’s frustrating for a stem to break. But, as is usually the case with things like this – you do feel grateful it didn’t decide to break going down Buker Brow at 40mph.

It may have been partly my fault as the screws were not tightened up equally. Some were screwed in more than others. This probably put more pressure on some corners of the stem. Even so, it’s not great it broke. It is an expensive light weight Deda stem.

Moral of the story. If you hear rattling on your bike, look at it straight away and take care tightening things up.

My Dad asked if I could fix it with gaffer tape, which I thought was amusing.

Adamo saddle review

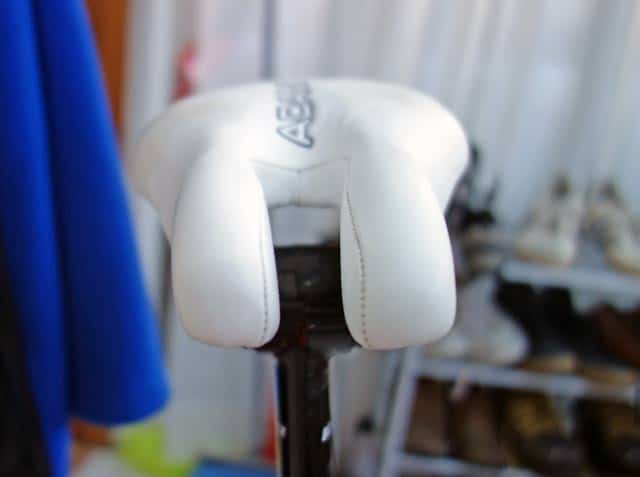
Adamo saddles are a unique design of saddles by the company ISM. The basic principle is to cut out the ‘dead’ area on a saddle. Focus saddle and padding on your ‘sit’ bones which is the most important thing and avoid the ‘numbness’ associated with sitting on a conventional saddle.

adamo-ISM-break

It certainly looks distinctive. This is the ISM, Adamo ‘Breakaway’

Motivations for buying an Adamo

In early Feb, I was doing a 90 minute effort on the rollers on my time trial bike. After an hour, the pain and discomfort in crotch area was really bad. By the end of the session, I just couldn’t bear to be in the time trial position. It felt like everything was getting squashed and numb. I wanted to finish the 90 minutes on rollers, but I could only do it by getting out of the saddle (which on the rollers is tricky)

Also, in last years National 100 (5th in a time of 3.46) the last 10 miles were ruined by great pain in shoulders and groin. I was squirming all over the bike because of the numbness and lost substantial time.

Since, I want to do a 12 hour time trial on the TT bike, I knew something had to change. Adamo saddles have been recommended to me by quite a few time triallists. Not everyone is convinced, but some people seem quite passionate – and it is rare for people to get passionate about a saddle (apart from maybe Brooks). Just looking at the Adamo Saddle made me think it was more comfortable. Like all great inventions and designs, once done, it seems so intuitive to put the padding where you need it and cut away where you just get numbness.

Adamo Time trial version

Adamo produce an almost bewildering array of variations on their original saddle. It would be hard to test them all. But, since I was buying for time trials, the obvious option was to buy the time trial saddle.

adamo-scale

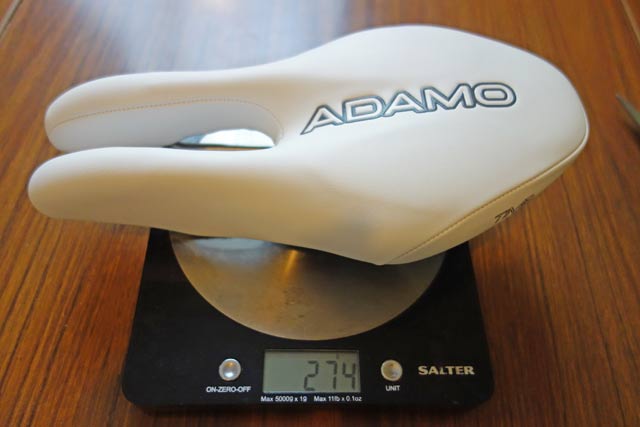
Adamo TT weight 274 grams – lighter than most other versions.

Adamo also claim that  for the time trial saddle:

‘The design allows for increased hip rotation, thus decreasing a rider’s aerodynamic drag and opens the diaphragm for easier breathing. Riders report an increase in wattage due to the more aggressive positioning. Sloped front arms provide extra relief to the superficial perineal space.”

This wasn’t my motivation for buying, but increased wattage seems a good thing.

Review of riding experience

The first ride was two hours on the rollers on the time trial bike. That’s quite an aggressive position and involved not stopping or getting out of the saddle.

It was a revelation. The improvement in comfort was very marked. I would say at the end of 90 minutes, there was 60% less pain, and after two hours I could still have kept going. That awful feeling of numbness just wasn’t there. This is the most important feature of the saddle, it really does work and makes long distance time trialling less painful.

Since that first roller session, I’ve done two four hour rides on the time trial bike. Again, it is remarkably comfortable for four hours in a race position. I will review after doing a 100 mile race and 12 hours. But, I’m confident that the saddle will make a significant difference and justify its price tag.

It is not to say it is a panacea. After two hours on the rollers, my seat bones (the bones which make most contact with saddle) were a little sore. You could tell they had absorbed a lot of weight. But, it is a very manageable ache, and more noticeable when you get off the bike. To be honest, if I was racing on an open road, I would have moved around more and given my backside more breathing space than two hours on the rollers.

Is there increased hip rotation? ISM claim increased hip rotation, and I when I spoke to  Matt Bottril last year at the BDCA 50, he was saying he found the Adamo saddle helped his power.

But, to be honest, I was so absorbed in noticing the improved comfort, that I didn’t really notice much difference in actual power I was putting out. Maybe there is an advantage, I would have to retest.

Update after nine months use – One downside of Adamo is that I have had chaffing on the outside of the saddle – on the inmost thighs. You don’t notice whilst cycling, but after it has been raw and I’ve been putting on Sudocrem – it’s not a show stopper, just a bit irritating.

adamo-front-view

Front view of Adamo saddle

Read more