Rear mounted bottle cages

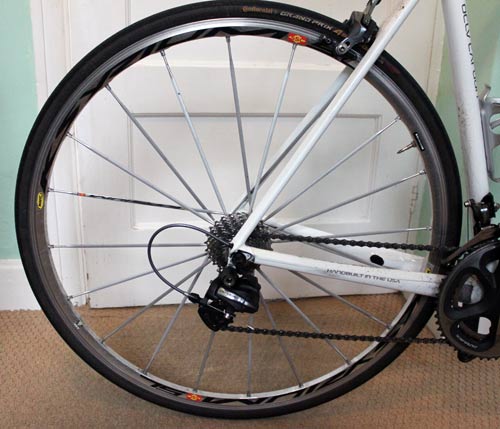
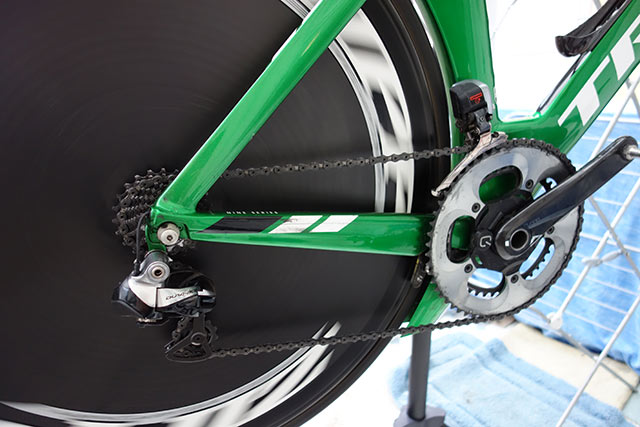
A rear mounted bottle cage is generally a good aerodynamic place to carry an extra bottle. For long distance riding, it is a good option, though a little awkward (and un-aerodynamic) to get from behind saddle.

One challenge with 100 mile time trials is working out how to carry enough fluid. I’ve done 100s on two bottles, but often felt it was insufficient and suffered as a result. A rear mounted saddle is a good place as it is generally out of the wind.

An important note is to make sure the bottle is secured. I have had experiences with bottles ejecting themselves. Make sure you test over suitably bumpy roads – before the big race!

Most aerodynamic position for a bottle

I’ve seen quite a few aero tests and suggestions that the optimal position for a water bottle is in this order

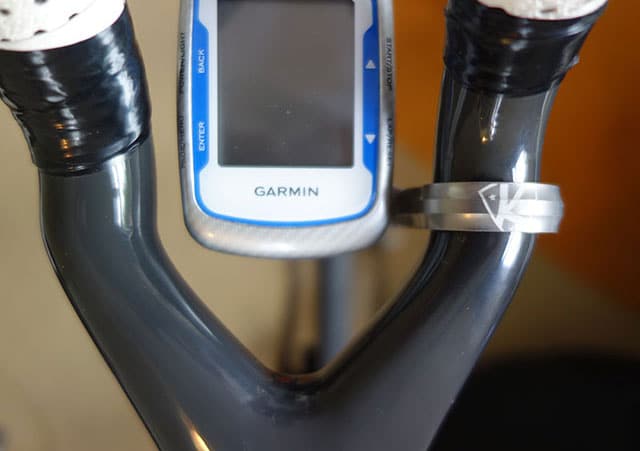
  1. Between the tribars at the front of the bike (Tribar mounted waterbottle)
  2. Behind the saddle (rear-mounted)
  3. On the downtube
  4. On the seat tube

The first two have little aero drag. Some claim that having a bottle between the arms on the tribars reduces aerodrag. On the downtube, aero drag could cost 45g for a standard water bottle (according to tri-radar)

Testing water-bottles depends on how the bottle interacts with the frame and rider. Some TT bike designs have been specifically designed to make the water bottle more aerodynamic.

Rear mounted bottle cages are also said to be quite good in limiting aero drag, so I thought it would be good to get one. I did use one many years ago, it might have been my first 100 mile TT in 2005. But, the bottle jumped out and I never got to drink it. I think I threw away in disgust and have never revisited rear bottle mounts until a few years ago

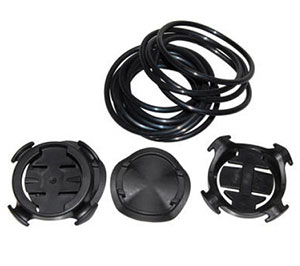
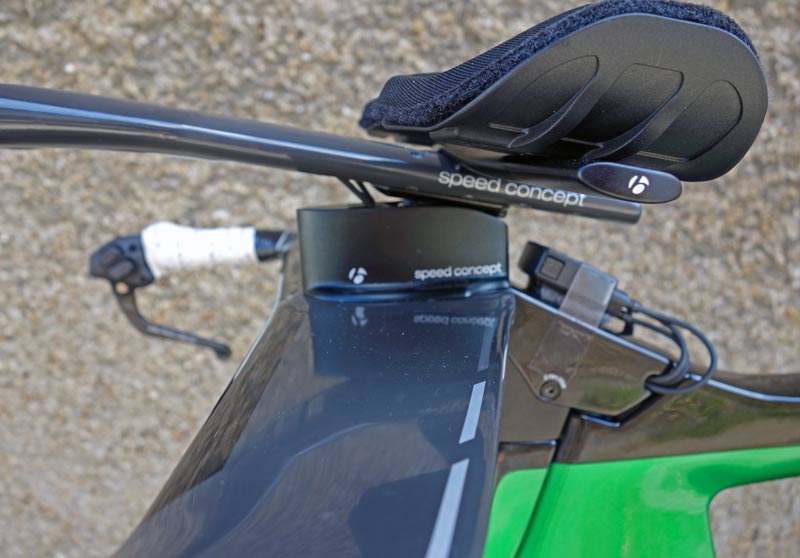
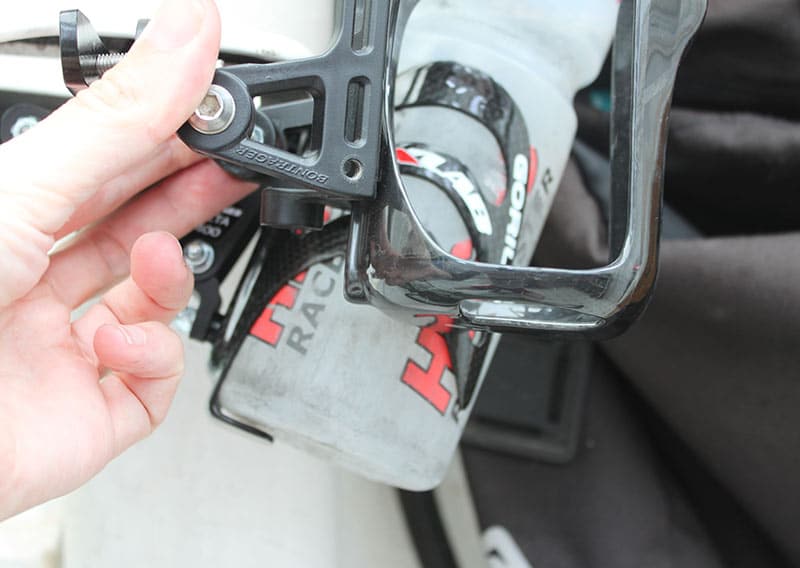
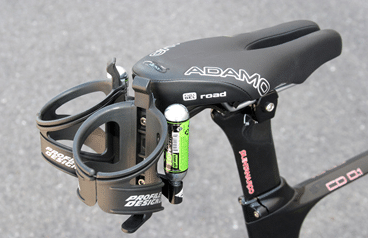
Bontrager Race Lite Rear Cage Holder

I bought a Bontrager Race Lite Mount rear mounted bottle cage. It cost £35 from a local bike shop. The advantage is that you can have two water bottles or one in the middle. It also has two places to screw in CO2 cylinders.

profile-aqua-rear-mounted-bottle-cage
using one bottle option

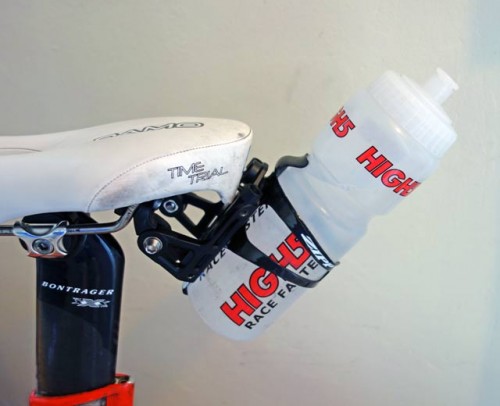
I have chosen to have just one bottle cage.  It’s fairly easy to set up and fairly sturdy. (It weighed 170gram with one water bottle.

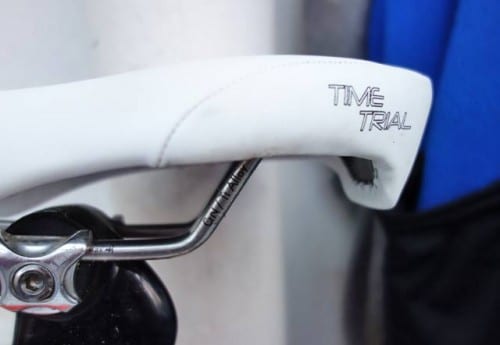
The difficulty I had is that with the Adamo saddle, there is limited room to fit. This means I had to have it at an angle of 45 degrees. I would preferred to have it at 90 degrees because the bottle would be less likely to fall out.

This is a drawback of the Adamo saddle. – A comfortable shape for long-distance timetrialling, but you have to be careful which water bottle system you get.

bontrager-rear-bottle

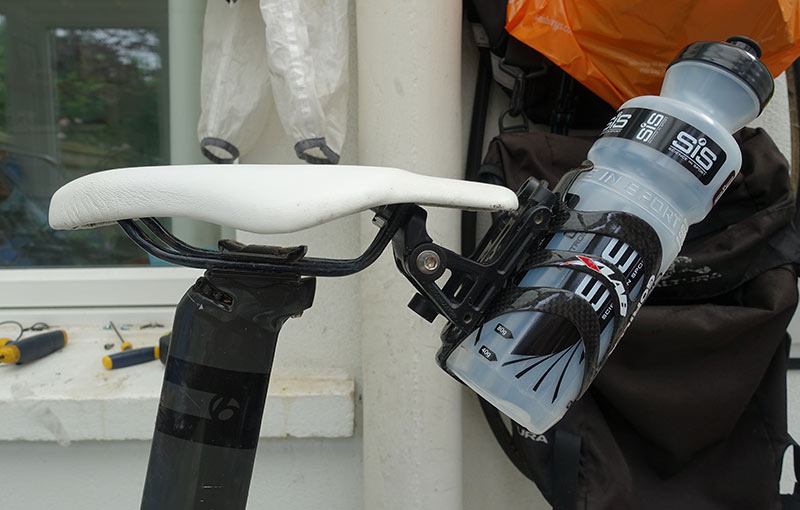
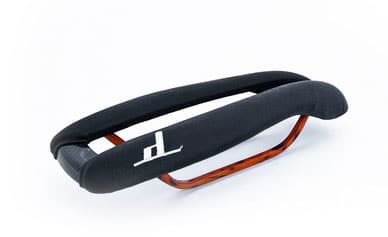
Since I first posted this blog, I have got a new saddle. A Dash saddle, which still has a long tail making it hard to get a bottle vertical.

However, it is quite aerodynamic and easy to set up.

bontrager-rear-bottle

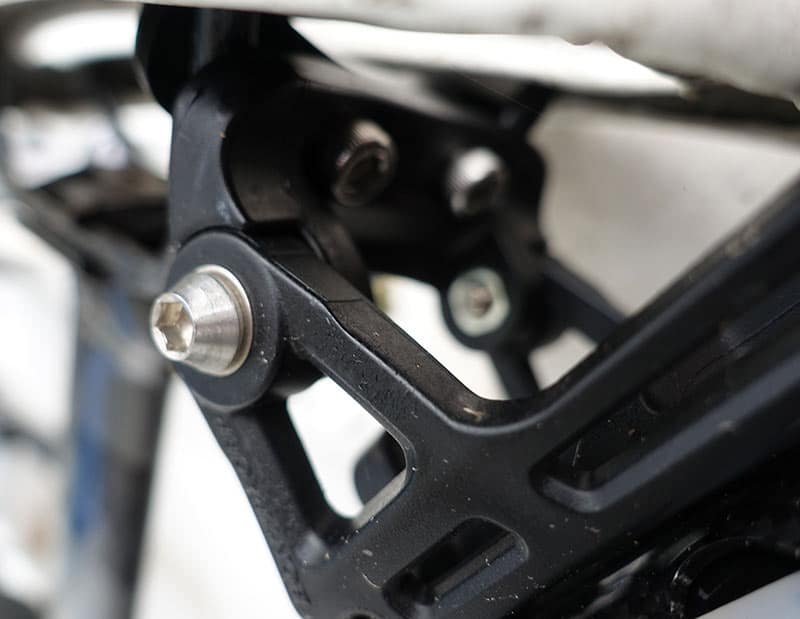
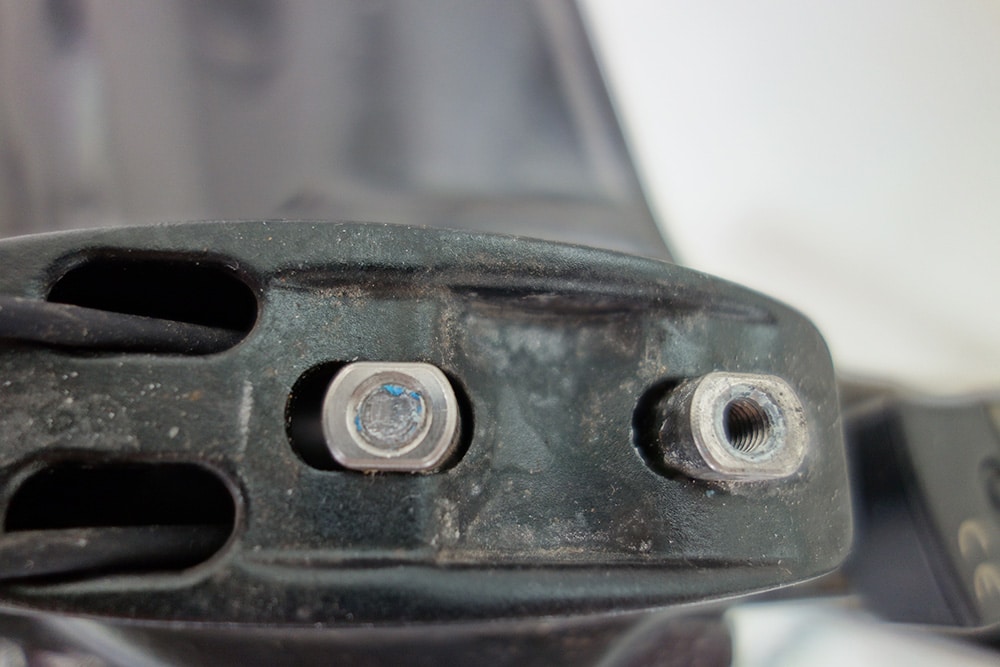
My concern about use long-term is that it is all held together by four Allen bolts. Two gripping cage to saddle. And two holding angle of the cage. I am testing in training, and its held up, though there is some small degree of slip. They really should have bolts on the other side of the side screws. You want to check pre-ride.

Strong Grip bottle cage for rear set up

I chose a Gorilla X-Lab water bottle cage and ditched the Bontrager because it has extra gripping power. I think this is important for rear mounted bottle cages at an angle. The risk of bottle ejection is quite high. I have used the Gorilla X-Lab bottle cage for many races and it is very reliable in having a strong grip. In fact, sometimes, you have to get used to the stickiness of the bottle cage.


By contrast the first time I used this Bontrager Rear Bottle Mounted Cage  the bottle ejected 5 miles into the ECCA 100 mile, 2014. It is relatively cheap compared to others)

Xlab Delta 400

xlab-delta-bottle-cage

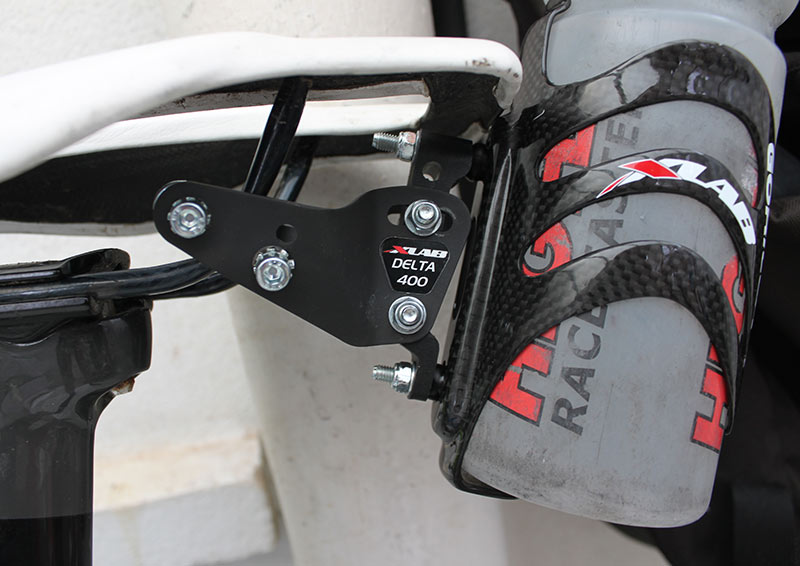
I have also been testing this XLab Delta 400, hoping it would be better than the cheaper Bontrager version. Firstly, it is quite hard work to set up. You need a suitable sized spanner to hold locking nut in place. However, this time of set up gives a very strong and sturdy set up (more reliable than Bontrager). The angle of cage is also adaptable, though it is limited by my saddle.

xlab-delta-400

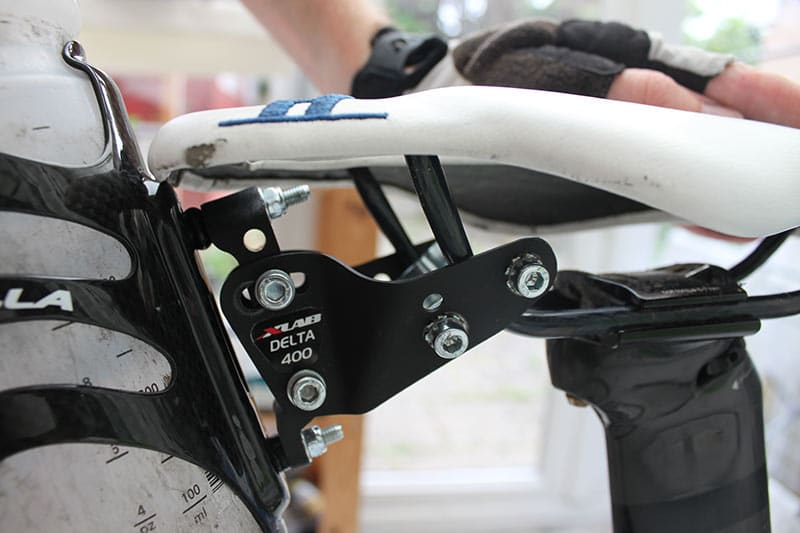
It is a pretty secure system. If you tighten to correct torque, you will have no problems.

bontrager-vs-xlab-bottle-cage
I got the Bontrager one to be higher up. The X-Lab Delta is more in the wind. (possibly due to shape of long Dash saddle.

Unfortunately, compared to the Bontrager it holds the bottle lower down, exposing more of the water bottle to the air. So although it is lighter, better built and a lot more expensive, I am better off using the Bontrager because it will be more aerodynamic.

X-Lab 400 rear mounted at Wiggle £79. –

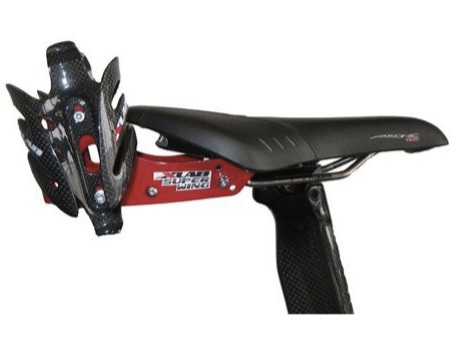
The X-Lab Super Wings seems to hold up bottles higher.

X-Lab-rear-mounted-bottle

Profile Aqua rear mounted bottle cage

profile-design
Source: Rear mounted systems

This has a different design and works well with the popular Adamo saddles. It is similar to the Bontrager system, but has a different fitting system which makes it easier to fit

Stopping bottles jumping out

  • Firstly have the bottle cage at 90 degrees, don’t risk anything like 45 degrees – even if it is easier to get to.
  • Choose a water bottle which is tight-fitting on the bottle
  • Be wary of using carbon fibre bottle cages which are more prone to breaking. You’re better off choosing a standard sturdy bottle cage rather than a 17gram special lightweight.
  • If you think it might fall out, try putting an elastic band around the bottle. This will make the bottle wider and more sticky. (Though it didn’t work for me!)

Other points about using rear mounted bottles

  • In long distance time trialling – hydration generally outweighs any aero penalty.
  • Weight isn’t such a big issue.
  • Another issue is that in the race, you can forget to drink. When you are so absorbed in the effort of racing, it can be hard to pick up a bottle from behind the seat. This is another advantage of water bottle between the tribars – you can’t forget about it because it’s always in your face. If you do have a bottle behind the saddle make sure you don’t forget about it.
  • Test before a race! Go for a ride over bumpy terrain and see if your bottle stays in. If you test in a race you might find yourself one or two bottles down.
  • Always be prepared for mechanical mishaps. Even if you are carrying three bottles, ideally you will have a spare one by the side of the road, just in case one does fall out.
  • Make sure you tighten the bolts to the correct torque. This will make it less likely to fall out.

In triathlon community, the X-Lab rear mounted bottle system has good reviews. It offers quite a comprehensive choice of carrying options. Its design also means it fits nearly any saddle.

I was put off by the cost £69.99. But, if you are going to be doing a lot of long distance cycling, this may be a good option.

Conclusion

I’m using Bontrager water bottle cage, but I’m not entirely happy with it. It’s not 100% secure and I had to buy alternative water bottle cage (Gorilla). But, it does OK in aero testing.

Related

Lightest wheels

An evaluation of the lightest wheels available for a road bike.

For several years, I used a pair of  Zipp 404 which are excellent all-round wheels; they are also quite light, yet aerodynamic. However, they are not the best choice for some of the steepest hills.

zipp-404-firecrest

The combined weight of the Zipp 404 weight pair Tubular front 568g – rear 696g was 1266 grams.

Interestingly the new version of Zipp 404 Firecrest are heavier than my old model. The 2014 Firecrest tubular has a weight of 1470 grams according to Zipp. But, with claims of much better aerodynamics.

AX-Lightness Premium Road

My front wheel is based on a Tune Mig 45 20 hole. Built onto AX-Lightness SRT 22 20 Hole rim superspokes.

This comes in at 365 grams (actual) With a super light track tub, it is only 523 grams.

When I have visitors around, I sometimes give them this wheel to pick up with their little finger. It always elicits an exclamation as the little finger goes shooting through the roof. ‘That’s light!’ comes the cry. – Everybody needs a party piece, mine just happens to be offering a lightweight front wheel to pick up. (maybe I should take up juggling instead?)

Read more

Dura Ace Di2 vs Ultegra Di2

Not the most interesting post today, the technical details of Shimano Dura Ace Di2 vs Ultegra Di2.

One reason for a post like this, is that I can spend ages googling details of different products, and before you know it hours have passed. However, when you come back to it a few days later, you can never seem to find the useful pages that you had a few days ago. Even now, I can’t re-find some pages I had on Saturday. Putting it in a blog, hopefully serves as a useful reference.

Generally Google is very good, but if you’re searching something very specific like the weight of Dura Ace Di2 vs Ultegra Di2, you often don’t get what you are looking for, and many hours are wasted in a vain search.

My philosophy for writing blogs is to write something, that I’d like to read myself. Hopefully if it’s useful for me, it will be useful for others (although this one, will be limited to those if you’re contemplating electronic shifting)

(By the way, after writing this post, I got Dura Ace Di2 9070 and have been using it on my timetrial bike. See review here Dura Ace Di2 9070)

Ultegra-6870-FrontMech-620x412

Ultegra Di2 v Dura Ace Di2 price

Firstly, the difference in price seems huge:

  • Dura Ace 9700 Di2 is RRP £2,999.99 (discounted at Merlin cycles for £1,999). Mechanical Dura Ace 9000 is by comparison £999 (at Ribble)
  • Ultegra 6870 Di2 is RRP £1,999 (discounted at chain Reaction cycles £979). Mechanical Ultegra 6800 is RRP £999 (Chain reaction £538.99)

But, when I go to Trek Project One – bike builder to upgrade from Ultegra 9870 Di2  to  Dura Ace 9700 Di2, it is an extra £1,970. For some reason – through Project One, they have made Dura Ace Di2, an extra £2,000. The problem is that £2,000 seems an awful lot of money for a groupset which is fairly similar to Ultegra apart from 300g, slightly more sleek design and greater flexibility in terms of shifting positions.

Read more

Garmin mount options

garmin-mount-3

There are various options for mounting your Garmin. Where space on your handlebars is a premium there are some extensions which give a wider choice of use, leaving more room for other stuff. Also, a forward mount can leave the Garmin in a better position for easier viewing whilst riding. It will save looking down on the stem (a la Froome) and can make a safer ride.

On my time trial bike, I needed a Garmin extension because there was nowhere suitable for a conventional mount. I looked at a few and in the end got the K Edge TT aluminium option for Beeline.

Traditional Garmin mount

Garmin-Quarter-Turn-Bike-Mount-500x500

The traditional Garmin mount is a nice piece of design. Easy to use, it can be set up pretty quick and moved between bikes fairly easily.

Edge 200, 205, 500, 605, 705, and 800.

Note for the Garmin 1000, you need a specific mount. They are not compatible.

I’ve had it on both stems and handlebars.  But, it does take up space.

K Edge – TT Garmin Mount

The K Edge Garmin mount is a little heavier 35 grams – because it’s made out of aluminium.

garmin-mount-2

The K Edge TT model has a locking mechanism underneath. This is suitable for awkward positions – you don’t have to twist the Garmin, put you can twist a locking mechanism underneath the Garmin mount instead. This was good for placing the Garmin between the tribar extensions. It is quite adjustable.

garmin-mount-3

A nice and smooth looking piece of kit.

Fitting is not too bad, it just took a few minutes.

I’m fairly happy with the position. It’s mostly out of the windflow, though a little lower than optimal.

Read more

Trek Speed Concept Aerobars – keep breaking

speed-concept-bar-angle

I like to ride aerobars facing slightly upwards. The Speed concept bars allow a small degree of angle. I would like more, but this is about as far as it will go.

However, when keeping aerobars at this angle, seems to place great stress on one of the bolts.

bontrager-speed-concept-broken

Over time the bolt shears and breaks off.

Read more

Dash saddle – long term review

Dash-Cycles---Strike.9---2

I reviewed this last year, but I’m updating review after using it for a year, including a couple of 100 mile TT’s. It’s only when you’ve done a few hundred mile TT’s that you can really give a proper review to long-distance TT products.

Essentially, I’m very happy with product. In Nat 100, I hardly got out of aero tuck, but there was little pineal discomfort, until perhaps last 10 miles. The cut out in front of saddle avoids numbing pain in that area you would prefer to avoid. It is very comfortable, very aero, and lightweight. Also it avoids the chaffing I used to get on the Adamo (because Adamo is too wide at the front).

The only drawback is that it is expensive (and not so readily available); it’s difficult to choose which model to get – but overall it has been a good investment. I will be selling an Adamo on ebay soon.

Initial review

Dash saddles are an expensive alternative to Adamo saddles. It is a good option for those looking for the anatomic shape of a Adamo, but want something which is lighter and more aerodynamic.

Earlier this year I wrote an enthusiastic review of Adamo saddles – Essentially the shape of Adamo – with the cut out insert – makes cycling much more comfortable – especially when you are in a flat time trial position. The Adamo really made a big difference to time trial comfort. A 100 mile or even 50 mile TT used to be tortuous for squashing of the crotch area. The Adamo relieved this discomfort making long hours in the saddle much more palatable. However, as enthusiastic as I was about Adamo, I was dissappointed when putting it on the scales and seeing it go to over 275 grams. It’s also a bit of a block, creating an aero drag. For many timetrialists and triathletes this weight and shape is not such a big deal, but for a hilly time trial specialist, you don’t want to be wasting 200 grams on a saddle. Also, I didn’t like the rear lip, which is used to hang up a bike in triathlons.

adamo-lip-back
not how I would design a TT saddle

Another drawback of the Adamo that I noticed after a season of riding – was that you got superficial chaffing on the inside of the thighs, perhaps because the front of the saddle is quite wide. This isn’t really a problem when riding, but after there was a persistent irritation for quite a long time. I could live with it, but still quite annoying. However, the amazing thing about spending a year on an Adamo was not a single saddle sore all year!

To overcome ‘lip’ of the Adamo TT, I decided to buy an Adamo Podium because it looked a bit more aero. However, when I went into UBYK in Oxford, they suggested having a look at the Dash saddles – twice as expensive, but more than half the weight, and they did look a thing of beauty. Sleek, aero and slim.

Dash stage .9
Dash stage .9

I don’t like spending money on new equipment, but this did look like an expense that could be justified. Lighter and more aero and looks beautiful – the only doubt was could it replicate the comfort of the Adamo?

Read more

Garmin Mount for TT bike

When I use a water bottle on the aerobars, I can’t use the standard Garmin mount, so looked for alternatives which can be fixed to the bike.

K-Edge TT mount

garmin-mount-2

The K Edge TT model has a locking mechanism underneath. This is suitable for awkward positions – you don’t have to twist the Garmin, put you can twist a locking mechanism underneath the Garmin mount instead so it can work in tight areas with little room for manoeuvre. This was good for placing the Garmin between the tribar extensions. It is quite adjustable.

Read more

Hotpads for cold feet

hotpads

hotpadsHotpads are small disposable packets that can be slipped down a pair of socks to keep your feet warm when it’s very cold.

If you wear thermal socks and a good pair of overshoes, you might not need them. But, for many with poor circulation in the extremities, these can be the difference between being able to cycle in the cold and getting too cold.

Little Hotties hand warmers – 10 pairs, £8.99 or 40 pairs from £21.99

Hot pads for cold feet – pack of 40 for £28

Hand warmers – pack of 10 for £12

It doesn’t matter if you buy hotpads for feet or hands, they are 100% interchangeable.

This has been one of the mildest winters so far and I haven’t needed to use too many. But, the cold spell this week (less than 5 degrees) means I definitely will be using.

I have poor circulation in both hands and feet. I feel the cold more in the feet because the toes are mostly immobile whilst cycling. When the temperature drops below 7 degrees, my feet can’t survive for more than an hour without extra  heat. – (no matter what combination of socks and overshoes I try)

I have had electric socks, but last year they broke and so stick to these hot pads. (at Amazon.co.uk)

Basically, when you take them out of a plastic wrapping some chemical reaction creates heat which lasts for seven hours. I put them in my cycling shoes just above a pair of socks. They are great for long rides.

They can be expensive if bought individually, you can pay up to £2 for a pair. But, buying them in bulk means I can get them for 50p a pair. They are disposable, so its a little extravagant, but before I found these  I used to really suffer. I used to wear about three pairs of socks and overshoes and go from cafe to cafe warming up my icey feet (which actually puts you at risk of chilblains)

Also, when you’re feet get very cold, the temptation is to wear several layers of socks, but when you squeeze into your cycling shoes, the socks can actually constrict your blood flow, a key factor in making you cold.

Review of Hotpads

They really do work. It’s not a gimmick. They are 100% reliable. Even after 5 hours, you can still feel the heat.  I always use a thin layer of socks, then put the hotpad and then a thicker layer of socks to keep the heat. This particular brand is good because the pads are quite small, but provide just the right amount of heat to avoid feeling scorched, but also to provide a heat source.

Also, useful if you get a puncture in freezing weather and have to take off your gloves to mend a puncture.

I will use them in some early season races. I’d rather have the extra weight than toes going cold and cramping for lack of blood.

Alternatives to Hotpads.

I have tried the re-usuable hotpads. You can re-energise them in hotwater or microwave – depending on the model. However, these tend to be bigger, and much more difficult to get into a pair of cycling shoes. Also, I find they may only last for one or two hours.

My philosophy is that winter cycling is tough enough. I always try to do anything to make the ride more comfortable, enjoyable. Hot pads are my saviour for winter riding. If you have very good blood circulation, you may not need them unless it goes below freezing. But, if you do suffer from cold hands and cold feet, definitely give these a try, buy a box – forget about the cost. And then you have one less excuse for not going out in winter!

Related

dhb Extreme Weather overshoe

The dhb Extreme Weather overshoe is a tough, rainproof overshoe designed for cold and wet winter rides.

dhb-overshoes-n

I received a free review copy in the post at the start of the month. Training has been somewhat interrupted by minor injury niggles this month, but I’ve still been out several times. Often wet, and only a couple of times cold.

The shoe is pretty impressive in being waterproof. Constant spray doesn’t seem to get through at all, which is a big bonus.

Read more

Dura Ace Di2 9070 Groupset review

I’ve been using the Shimano Dura Ace di2 for a couple of months now, so I thought, after extensive testing, I would give a review.

Overall, I’m very impressed. It is very good and makes a difference over mechanical shifting. It is very expensive, and initially I was regretting spending the money on Dura Ace, when I could have saved a £1,000 and got Ultegra, but now I’m glad I ‘bit the bullet’.

For many years in cycling, ‘electronic gears’ got a bad press. When electronic gears were first introduced, they were often reported as ‘freezing in big races’ and this put me off electronic for a long time. But, Di2 seems to be very durable.

whole-di-2
Dura Ace Di2 – 56*21


Durability

I’ve been using for a couple of months, without any issues, but to get a better perspective I asked my mechanic friends at Beeline. Mark said they have seen a lot of people use Shimano Di2, and it has been excellent for durability and easy of maintenance. He said it was a lot more reliable than other electronic gears. Mark said many people just ride their bike all year and get it serviced once a year. He said Di2 was good for those riders who didn’t want to do anything but just ride and recharge their batteries. He seemed quite enthusiastic about Di2 and would recommend it as the best groupset.

Read more