I started using Speedplay pedals back in 2006. I wrote the first review in 2008. This is an updated review after using them for nearly fourteen years.
Summary
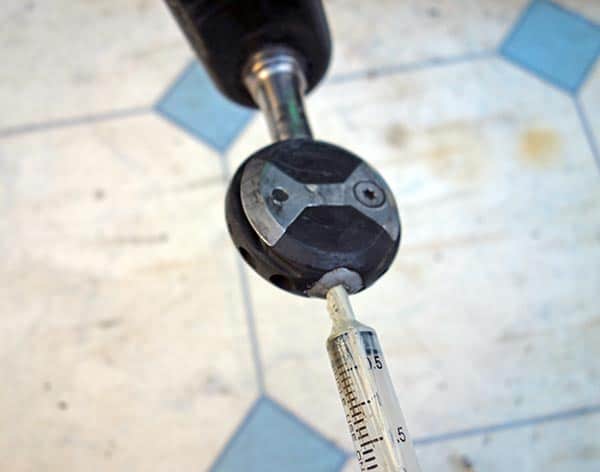
Speedplay pedals are very good to ride on. They took a little bit of getting used to (like floating on ice is common feeling), but now I don’t want to go to any other system. They are light, small and easy to use. I’ve never had any problems when actually cycling with them, and since pedalling is so important, this makes me want to like them and overcome any faults they may have. The main drawback of Speedplay pedals is that they have been an expensive choice. In particular, they are more prone to long-term maintenance problems. Three times I’ve had to throw away a pair because the internal bearings seized up (it was always the left pedal which went. So I have three spare right pedals lying around).
I once complained to Speedplay and someone from America rang up to say they never get maintenance problems if you look after them and pursue regular maintenance – using grease gun and lube. I was disappointed I couldn’t buy a spare left-hand pedal to match up my surplus right pedals.
If you do buy Speedplay, it is really essential, you learn to grease and lube regularly; I wish I had done earlier.
Why I Switched to Speedplay
My first clipless pedals were the more common Look pedals. The reason I switched to Speedplay pedals was:
I had some problems with my knees and (rightly or wrongly) I blamed the Look pedals and the way my movement was restricted. I liked the idea of having a large angle of float that comes with Speedplay
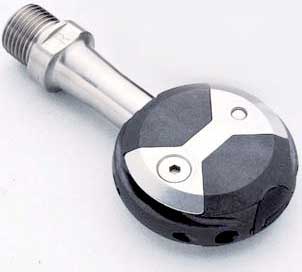
I wanted to save weight. Speedplay comes in at 205 grams and 150 grams for Titanium version. These were the lightest pedals on the market, at the time. However, the gap between the weight of Speedplay and Look has been reduced with the introduction of new models like the Look Keo. At 240 grams + cleats they offer good value for money at only £39.99
Very aerodynamic – pedal is small surface area.
Cleats are easy to set up. I always found the Look cleats a bit fiddly to get in the right position. If they were slightly out, it could cause problems. Speedplay are much easier to set up because of the greater degree of lateral movement.
Optimal power transference because the pedal is encased in the shoe with minimal stack height. Whether there actually is better power transfer, I don’t know. But, it does feel good.
I like many aspects of Speedplay Zero Aero – and may buy if I get back into racing.
Using Speedplay
I have been very happy with the Speedplay. They are definitely a little strange when you first test them. But, it is amazing how quickly you can get used to the large float. Cycling with Speedplay feels very natural. Some might feel the large degree of float makes it harder when sprinting.
A rear mounted bottle cage is generally a good aerodynamic place to carry an extra bottle. For long distance riding, it is a good option, though a little awkward (and un-aerodynamic) to get from behind saddle.
One challenge with 100 mile time trials is working out how to carry enough fluid. I’ve done 100s on two bottles, but often felt it was insufficient and suffered as a result. A rear mounted saddle is a good place as it is generally out of the wind.
An important note is to make sure the bottle is secured. I have had experiences with bottles ejecting themselves. Make sure you test over suitably bumpy roads – before the big race!
Most aerodynamic position for a bottle
I’ve seen quite a few aero tests and suggestions that the optimal position for a water bottle is in this order
The first two have little aero drag. Some claim that having a bottle between the arms on the tribars reduces aerodrag. On the downtube, aero drag could cost 45g for a standard water bottle (according to tri-radar)
Testing water-bottles depends on how the bottle interacts with the frame and rider. Some TT bike designs have been specifically designed to make the water bottle more aerodynamic.
Rear mounted bottle cages are also said to be quite good in limiting aero drag, so I thought it would be good to get one. I did use one many years ago, it might have been my first 100 mile TT in 2005. But, the bottle jumped out and I never got to drink it. I think I threw away in disgust and have never revisited rear bottle mounts until a few years ago
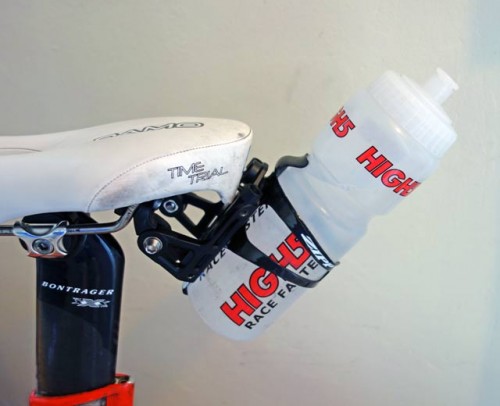
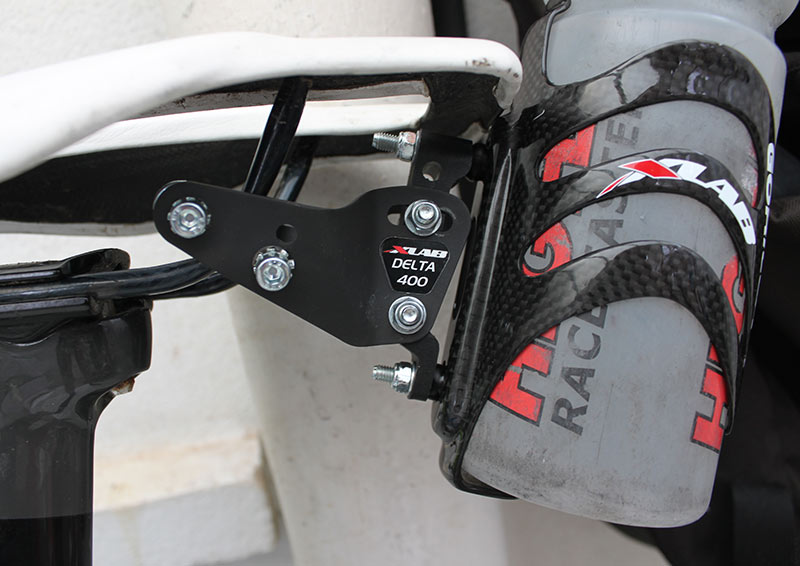
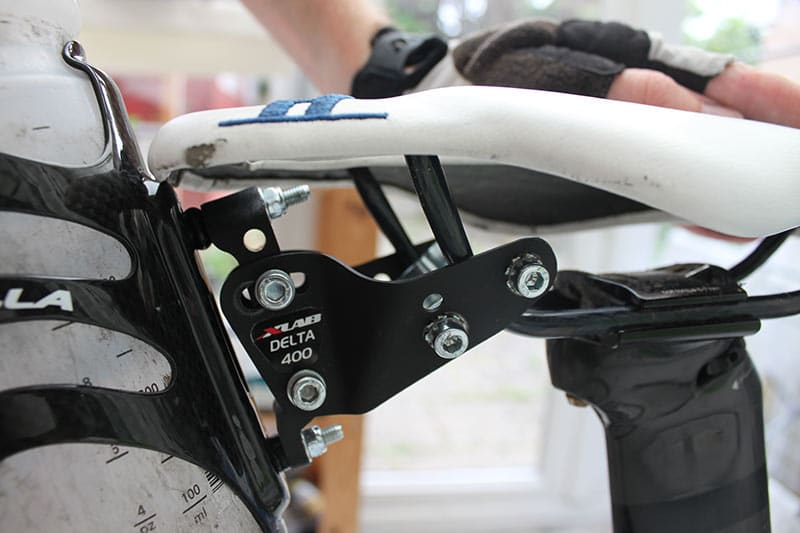
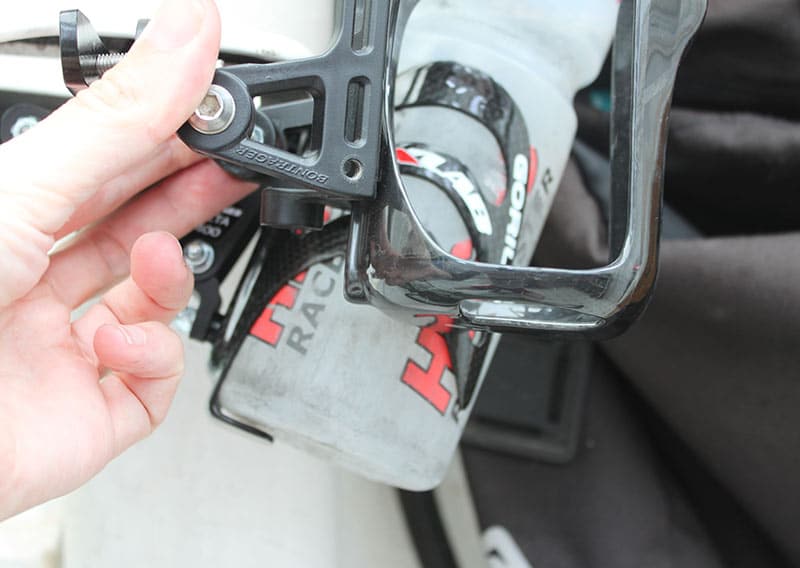
Bontrager Race Lite Rear Cage Holder
I bought a Bontrager Race Lite Mount rear mounted bottle cage. It cost £35 from a local bike shop. The advantage is that you can have two water bottles or one in the middle. It also has two places to screw in CO2 cylinders.
using one bottle option
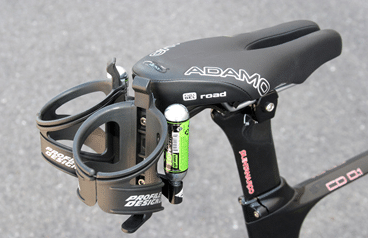
I have chosen to have just one bottle cage. It’s fairly easy to set up and fairly sturdy. (It weighed 170gram with one water bottle.
The difficulty I had is that with the Adamo saddle, there is limited room to fit. This means I had to have it at an angle of 45 degrees. I would preferred to have it at 90 degrees because the bottle would be less likely to fall out.
This is a drawback of the Adamo saddle. – A comfortable shape for long-distance timetrialling, but you have to be careful which water bottle system you get.
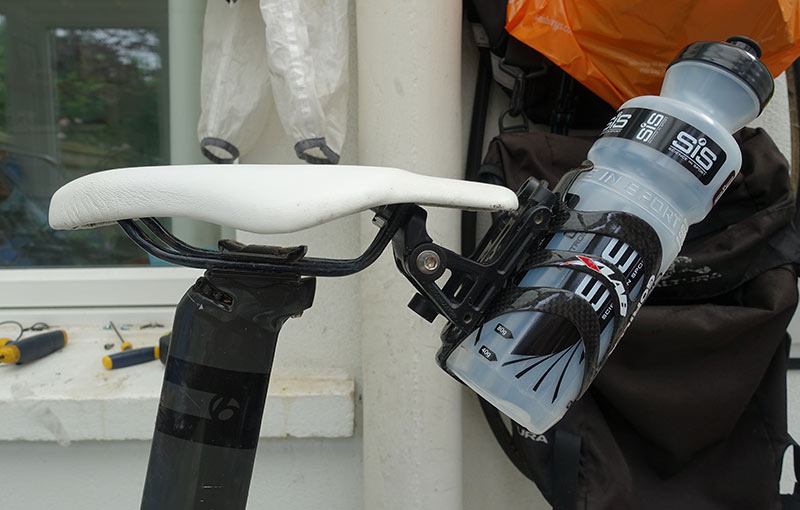
Since I first posted this blog, I have got a new saddle. A Dash saddle, which still has a long tail making it hard to get a bottle vertical.
However, it is quite aerodynamic and easy to set up.
My concern about use long-term is that it is all held together by four Allen bolts. Two gripping cage to saddle. And two holding angle of the cage. I am testing in training, and its held up, though there is some small degree of slip. They really should have bolts on the other side of the side screws. You want to check pre-ride.
Strong Grip bottle cage for rear set up
I chose a Gorilla X-Lab water bottle cage and ditched the Bontrager because it has extra gripping power. I think this is important for rear mounted bottle cages at an angle. The risk of bottle ejection is quite high. I have used the Gorilla X-Lab bottle cage for many races and it is very reliable in having a strong grip. In fact, sometimes, you have to get used to the stickiness of the bottle cage.
I have also been testing this XLab Delta 400, hoping it would be better than the cheaper Bontrager version. Firstly, it is quite hard work to set up. You need a suitable sized spanner to hold locking nut in place. However, this time of set up gives a very strong and sturdy set up (more reliable than Bontrager). The angle of cage is also adaptable, though it is limited by my saddle.
It is a pretty secure system. If you tighten to correct torque, you will have no problems.
I got the Bontrager one to be higher up. The X-Lab Delta is more in the wind. (possibly due to shape of long Dash saddle.
Unfortunately, compared to the Bontrager it holds the bottle lower down, exposing more of the water bottle to the air. So although it is lighter, better built and a lot more expensive, I am better off using the Bontrager because it will be more aerodynamic.
The X-Lab Super Wings seems to hold up bottles higher.
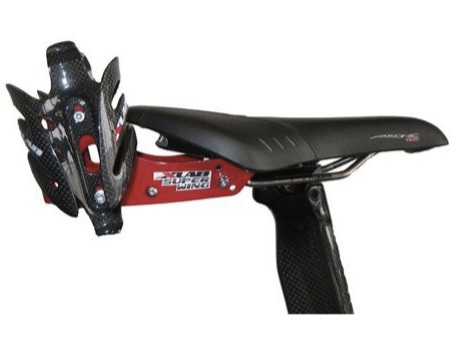
Profile Aqua rear mounted bottle cage
Source: Rear mounted systems
This has a different design and works well with the popular Adamo saddles. It is similar to the Bontrager system, but has a different fitting system which makes it easier to fit
Firstly have the bottle cage at 90 degrees, don’t risk anything like 45 degrees – even if it is easier to get to.
Choose a water bottle which is tight-fitting on the bottle
Be wary of using carbon fibre bottle cages which are more prone to breaking. You’re better off choosing a standard sturdy bottle cage rather than a 17gram special lightweight.
If you think it might fall out, try putting an elastic band around the bottle. This will make the bottle wider and more sticky. (Though it didn’t work for me!)
Other points about using rear mounted bottles
In long distance time trialling – hydration generallyoutweighs any aero penalty.
Weight isn’t such a big issue.
Another issue is that in the race, you can forget to drink. When you are so absorbed in the effort of racing, it can be hard to pick up a bottle from behind the seat. This is another advantage of water bottle between the tribars – you can’t forget about it because it’s always in your face. If you do have a bottle behind the saddle make sure you don’t forget about it.
Test before a race! Go for a ride over bumpy terrain and see if your bottle stays in. If you test in a race you might find yourself one or two bottles down.
Always be prepared for mechanical mishaps. Even if you are carrying three bottles, ideally you will have a spare one by the side of the road, just in case one does fall out.
Make sure you tighten the bolts to the correct torque. This will make it less likely to fall out.
In triathlon community, the X-Lab rear mounted bottle system has good reviews. It offers quite a comprehensive choice of carrying options. Its design also means it fits nearly any saddle.
I was put off by the cost £69.99. But, if you are going to be doing a lot of long distance cycling, this may be a good option.
I’m using Bontrager water bottle cage, but I’m not entirely happy with it. It’s not 100% secure and I had to buy alternative water bottle cage (Gorilla). But, it does OK in aero testing.
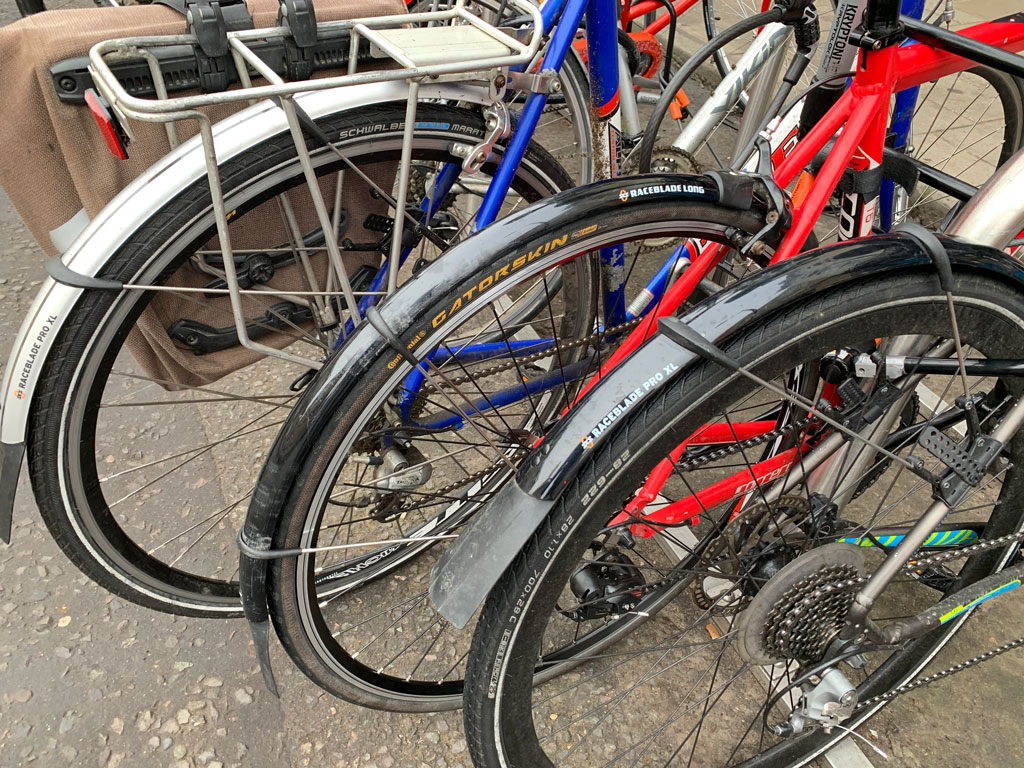
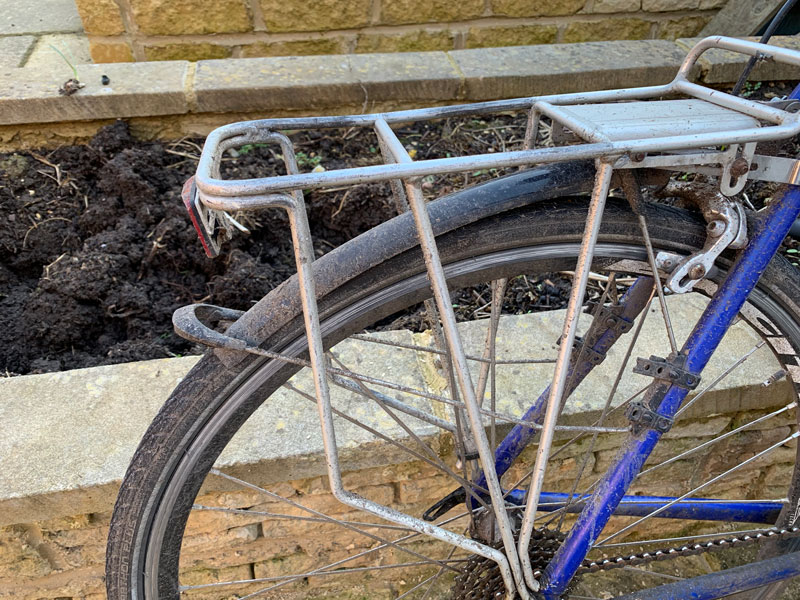
I’ve been a big fan of clip-on mudguards for many years. However, they do have a habit of breaking after several years of use. Parking bikes in Oxford is a bit rough and tumble, so these flexible mudguards tend to get a bit battered.
I got a few coats dirty using this depleted mudguard. Definitely time for an ugrade
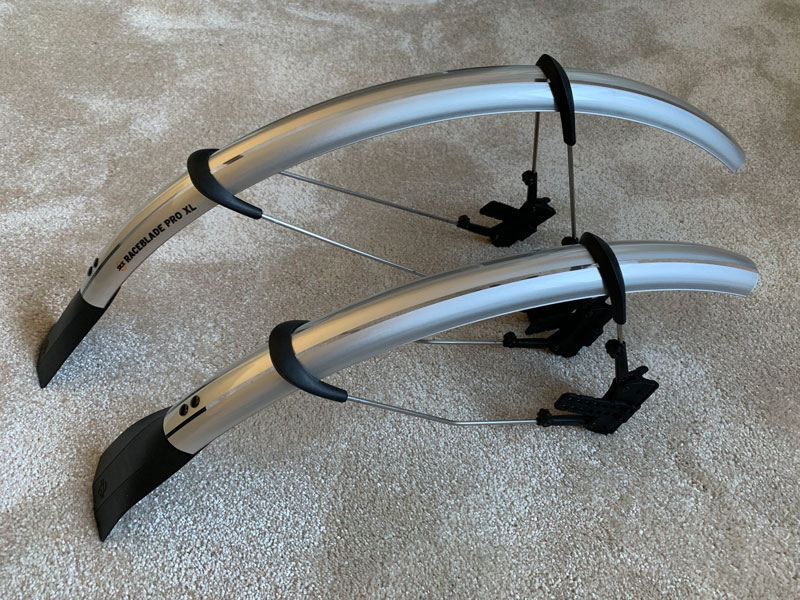
With my rear mudguard snapped in half, it was a good excuse to upgrade to the latest model – Race Blade Pro XL.
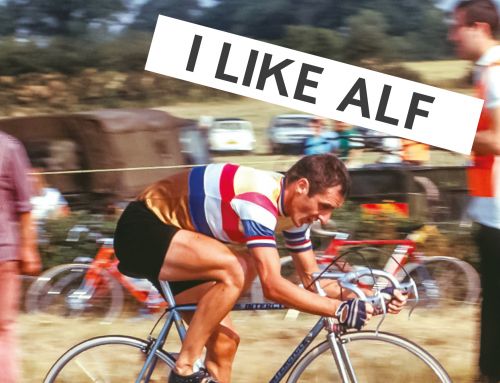
You can’t do time trialling in the UK without becoming dimly aware of a mythical figure called Alf Engers. Emerging out of that ‘golden age’ of the 60s and 70s when timetrials ruled the road, you pick up the odd snatched comments about the first sub-50 minute 25 mile TT on a road bike (no TT bars). Riding in the middle of the road. Brushes with authority. The London baker doing a night-shift to 3 am and then breaking records at 6 am. Even now, as the author mentions, you can still hear the phrase “But, what would Alf Engers have done?”
It all amounts to whispers from the past and, in the absence of direct testimony, you place your subjective impressions above any reality. Muffled opinions in between the course codes and obscure regulations. The funny thing is whenever I met the late John Woodburn, he would always tell me how he had to start a time trial with a working bell, and when he got around the corner from the start-keeper, he would throw it off in disgust. It’s a shame I never asked about his times racing with Alf Engers. It never occurred to me, but that’s one of the many things I learnt from the book.
The thing about legends of the past is that you never quite know fact from fiction, exaggeration from reality. Timetrialling doesn’t tend to throw up too many characters; it’s a sport for the nerds and obsessive attention to detail. A rock star in a sheepskin coat who snubbed his nose up at the stuffy RTTC by riding too fast has all the makings of a great story.
“I Like Alf” on the way to New York
When I heard Paul Jones would be writing a book on Alf Engers, I thought somehow that this was a match made in Heaven. If ever a writer could do justice to a biopic of ‘The King’, it was P. Jones – who can make even sparsely populated hill climbs sound exotic and exciting. Except with Alf – ‘Heaven‘ is perhaps not quite the right epitaph; more like a “match made in Heaven – with a touch of the devil’s mischief thrown in for good measure.”
If there is a drawback to the book, it is short. I read in two days. But, it reminds me of the pastor who gave an interminably long sermon of two hours – and when asked why his sermon was so long, he responded that he didn’t have time to make it short. Brevity is the soul of wit and all that. The benefit is that the book moves along at a great pace, evoking the spirit of the times from post-war Britain to the slow evolution of parochial time-trialling. At last, I have a direct understanding of Engers. – What made him tick, what he did for the sport, the great battles of the past – all within the context of today. It was like finding out that Robin Hood is a real historical figure, and he was a pretty decent bloke to boot.
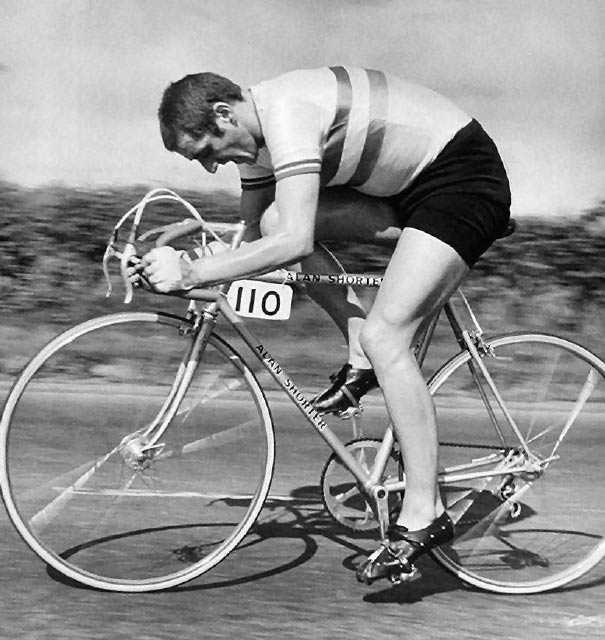
Alf Engers
As a story, you couldn’t make it up. It is hard to understand why a full-time baker could be banned from the sport for five years (age 22-27), because he had one failed season as an independent. It seems the spirit of amateur endeavour were lost in the rules, regulations and prejudices of the time. It is Alf’s comeback which is really the riveting part of the book. National records, complaints, counter-complaints, detractors and supporters in equal measure – it is all told with great pace, humour and sympathy to the rider who was breaking both records and pulling the RTTC out of its carefully controlled past.
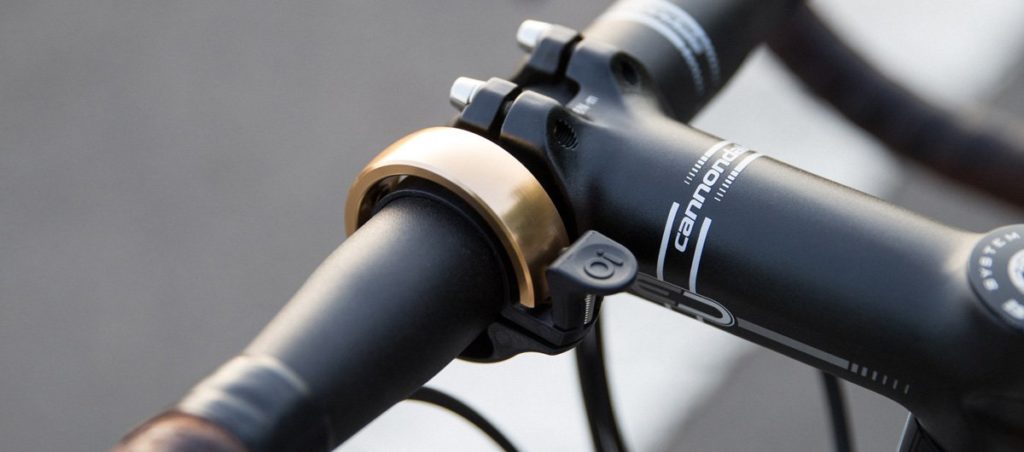
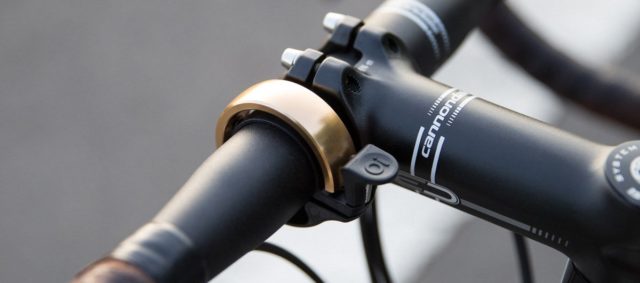
The Knog Oi Bike Bell is marketed as a bicycle bell which doesn’t look like or sound like an ordinary bike bell. The most striking thing about the new Oi Bell is that it has a very slim profile. This makes it easy to fit on the handlebars.
The sound is quite pleasing (a bit like a glockenspiel) and quieter than an ordinary bell. The ringer is also small and the first few times when I reached for the bell I missed the ringer at first glance. This was due to my reflexes being used to reach for my previous bigger bell. After getting used to the new position on handlebars it is fine.
(update: after 18 months of use it broke)
Optimal sound of a bicycle bell
Sometimes when I ring an ordinary bell, people jump out of their skins which probably makes them think ‘Bloody cyclist using my roads e.t.c.”
But then, on the other hand, you can ring your bell three times and the people are immobile – standing in the road or cycle path; when you go past, they mutter sarcastically ‘Don’t you have a bell?’ The problem with this bell is that it is quieter than ordinary bells. On a windy day on the footpath or during noisy traffic, the sound is easily lost in the environment.
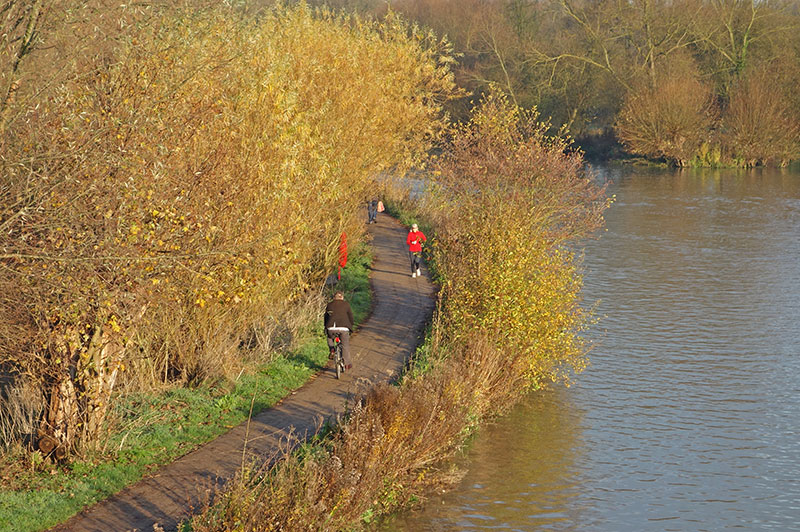
When using this cycle path by River Thames I often timidly ring my bell because I don’t want to sound like a menacing cyclist wanting people to jump out of the way. But, when I timidly ring the bell, they often don’t hear.
This Knog bell is quite good if you want to err on side of not ringing too loudly. The sound is certainly not threatening, but at a distance might not be heard at all. The problem is if people don’t hear, the bell becomes a mere ornament.
I used to get a lot of leg cramps at night. You get woken up by the feeling of your muscles in your calf suddenly tightening. It feels like the muscle tries to contract and then gets locked in the spasm. It usually lasts 5-10 seconds and then goes. The next day the calf muscle is a little sore. You can still cycle on it, but you don’t feel like training hard. It is frustrating because it interrupts training.
Leg cramps were more common when:
After a day of no cycling and complete rest.
When it is hot and more likely to be dehydrated. (I used to always get them in August in NY where it is hot and humid)
Avoiding leg cramps
After big training block, try to keep doing some cycling to keep the muscles ticking over. I guess this is one of the logic behind active recovery on ‘rest days’
Stretching the calf muscle sometime during the day. – especially important on days of no cycling. A simple calf stretch is to stand facing a wall with back straight. Keep your heel pressed to the floor and extend the leg until you feel a pull in your leg.
Avoid getting dehydrated during the day and take on extra salts. In particular magnesium is said to be important for avoiding leg cramps.
Not the most interesting post today, the technical details of Shimano Dura Ace Di2 vs Ultegra Di2.
One reason for a post like this, is that I can spend ages googling details of different products, and before you know it hours have passed. However, when you come back to it a few days later, you can never seem to find the useful pages that you had a few days ago. Even now, I can’t re-find some pages I had on Saturday. Putting it in a blog, hopefully serves as a useful reference.
Generally Google is very good, but if you’re searching something very specific like the weight of Dura Ace Di2 vs Ultegra Di2, you often don’t get what you are looking for, and many hours are wasted in a vain search.
My philosophy for writing blogs is to write something, that I’d like to read myself. Hopefully if it’s useful for me, it will be useful for others (although this one, will be limited to those if you’re contemplating electronic shifting)
(By the way, after writing this post, I got Dura Ace Di2 9070 and have been using it on my timetrial bike. See review here Dura Ace Di2 9070)
Ultegra Di2 v Dura Ace Di2 price
Firstly, the difference in price seems huge:
Dura Ace 9700 Di2 is RRP £2,999.99 (discounted at Merlin cycles for £1,999). Mechanical Dura Ace 9000 is by comparison £999 (at Ribble)
Ultegra 6870 Di2 is RRP £1,999 (discounted at chain Reaction cycles £979). Mechanical Ultegra 6800 is RRP £999 (Chain reaction £538.99)
But, when I go to Trek Project One – bike builder to upgrade from Ultegra 9870 Di2 to Dura Ace 9700 Di2, it is an extra £1,970. For some reason – through Project One, they have made Dura Ace Di2, an extra £2,000. The problem is that £2,000 seems an awful lot of money for a groupset which is fairly similar to Ultegra apart from 300g, slightly more sleek design and greater flexibility in terms of shifting positions.
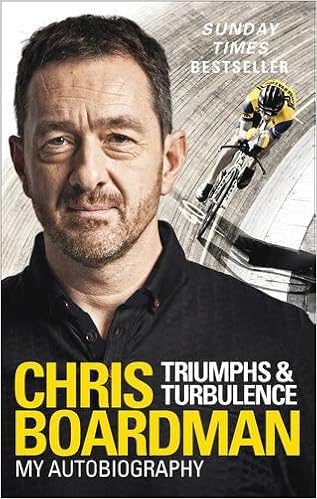
A few weeks ago, I received a review copy of Chris Boardman’s autobiography. This week I got around to reading and enjoyed the book. In terms of cyclist autobiographies, this ranks quite highly. It is interesting story, with many different aspects of cycling from domestic time trials to wearing the yellow jersey in The Tour de France. As well as his cycling achievements (and failures) you get a glimpse into the personality of Chris Boardman, and perhaps what he has learnt in life. There is a degree of humour and honesty which make the book an enjoyable read. If I had to choose a cyclist from that period of cycling who I genuinely admire, Chris Boardman would be near the top of a very short list. There is also the added interest of the fact that I can relate strongly to his early career (riding domestic time trials and hill climbs) I have followed Boardman’s career from the epic time trial battles with Graeme Obree reported in “Cycling Weekly” to his emergence as a sane and powerful advocate for better cycling on British roads.
If any cyclist epitomises the spirit of British cycling it is Chris Boardman.
Domestic time triallist, multiple national champion – from national hill climb to national 25 mile TT competition record holder.
Olympic track cyclist. Gold medal in 1992 Barcelona Olympics (Britain’s first gold on track for 72 years).
Three times world hour record holder.
Multiple world champion on road and track.
First British wearer of yellow jersey since Tom Simpson in 1968.
‘Cycling climbs of South West England’ is the latest instalment of Simon Warren’s 100 Best Cycling Climbs Series. The format is similar to previous books, such as 100 Greatest Climbs. It is the same handy size with photo and description of climbs. Some climbs are featured in the original book, but there are many more which may or may not be well-known to those who live in this area.
More interesting is to review the climbs themselves. For me, the region can be split in two. The first is the ‘deep’ South West – Cornwall, Dorset and Devon. Places which I am yet to visit on a bike.
The second section is the ‘north east’ of the South West – Gloucestershire, Wiltshire and Somerset. This section has climbs which feel like an extension of my own local roads. I’ve raced up Burrington Combe so often, I have developed quite an affinity with ‘The Combe’ and other roads around the Mendips.
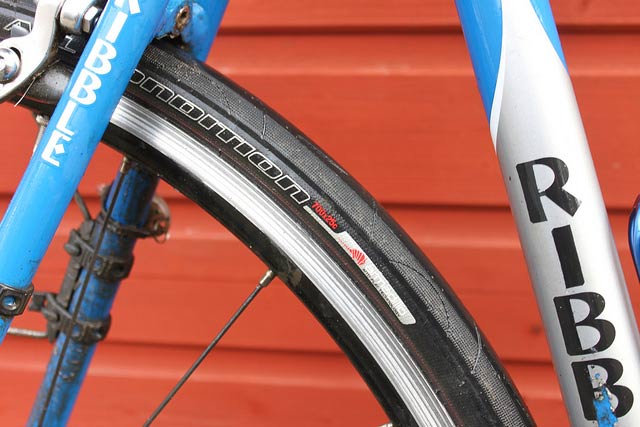
No ordinary tyre guarantees to be absolute puncture free, but improvements in technology have gone a long way to reducing your chances of puncturing. For the average rider and commuter, buying a puncture resistant tyre is probably one of best upgrades to make.
Highly puncture resistant tyres usually have a trade off of greater weight and higher rolling resistance (i.e. slower) but the slight decline in speed is well worth the greater peace of mind that comes from having less punctures.
These are some of the puncture resistant tyres that I have used over the years.
Armadillo – Specialized All Condition
The tyre feels pretty tough – it is a very robust 60 TPI (Threads per inch) – which is very different feel to the racing tyres of 300TPI. It’s toughness makes it very resistant to small scratches and glass cuts. It gives more confidence for commuting on a rought canal path. A minor downside of its toughness is that it’s a bit awkward putting on rim with fingers, but then you rarely have to change a puncture. It claims to be designed for low rolling resistance; but, in practice it feels heavy – it is is noticeably slower than a Grand Prix 4000. But, I am quite happy using it on my commuting bike and have also added to the rear wheel on my winter training bike, at various times.
I have been using them for over seven years (5 days a week) During that period I have had three punctures and one was a 6 inch nail. Roughly speaking its a puncture rate of 3 / 9,000 miles or 1 per 3,000 miles. It’s also pretty hard wearing, I get maybe 3,000 miles on rear and 5,000 miles on front, which is a long time for a commuting bike. At £30, overall this is a very good value tyre which offers excellent puncture resistance. It really is a good investment and one of my favourite.